

Self built campervan - So...December 23rd 2022 ... 4 am in the morning....it's raining heavily...I'm fast asleep...then....
BANG! CRASH!. SCRrrraaaapppppe...and the sound of rain on the Campervan Mark I. This was the result...

And I still had a wedding to photograph that day!
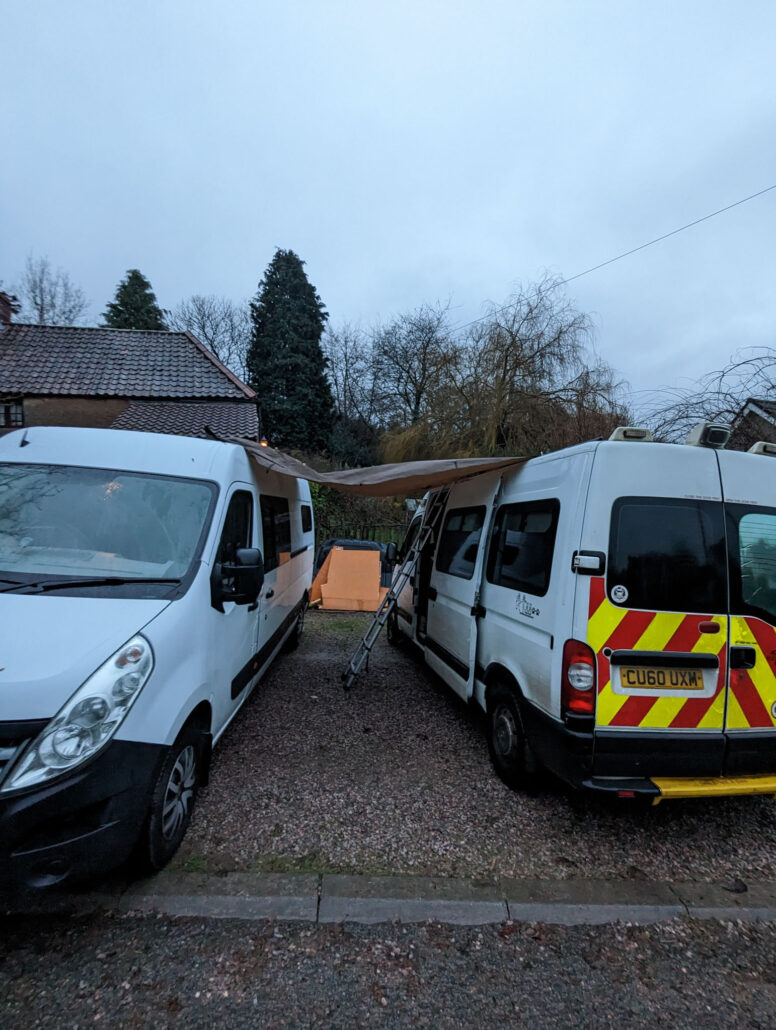
Anyway, by the end of an emotional wedding, I had a plan...find a new van, buy and convert it. And on January 1st 2023 drove to Birmingham to buy a new (to me) 2017 Renault Master panel van!
First things first
This is MY journey. I'm not a professional at anything except photography, and certainly not carpentry, electrics, current holes in metal vans etc. And as it's my blog post...I'm not interested in your viewpoint. This works for me!
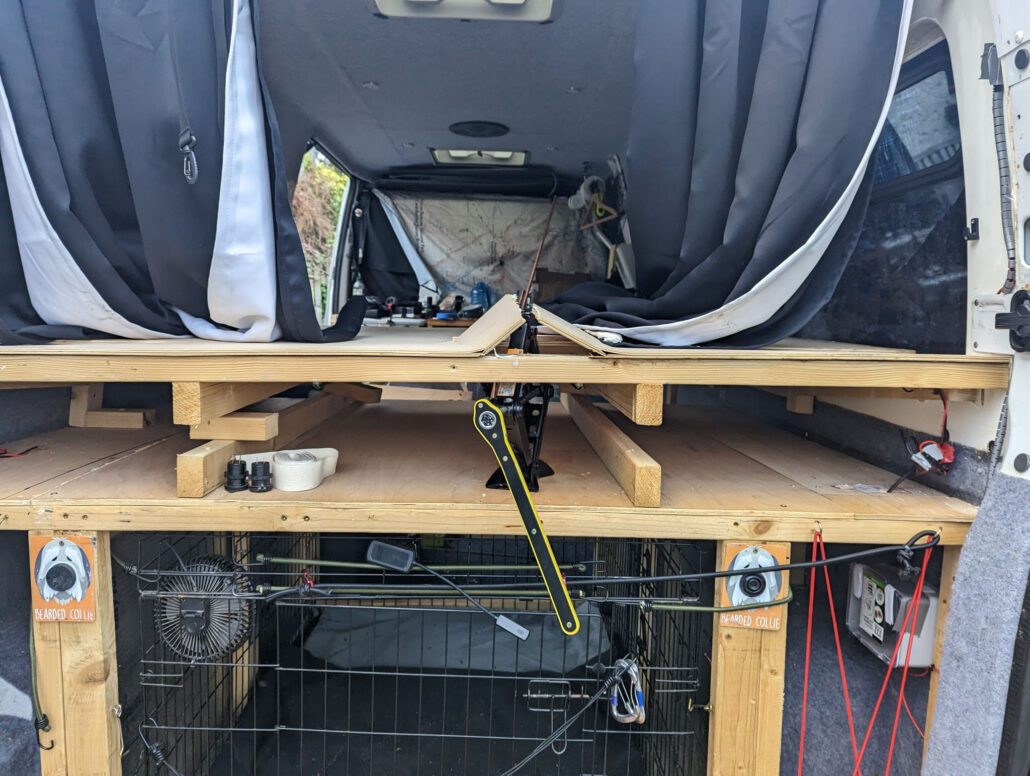
I needed to remove the stuff from the old van, recycle where I could and skip where I couldn't. I used screws and "Hard as Nails" glue to build the first one. And that glue is bloody strong. This is a 3t jack trying to pry up the beams that have been glued. It actually split 10mm of plywood before the glue came away. I ended up just cutting that whole top layer away and used the base for my mitre saw to build the new van. The old van then spent the next 7 weeks as a wood / tool storage van as well as a builders hut!
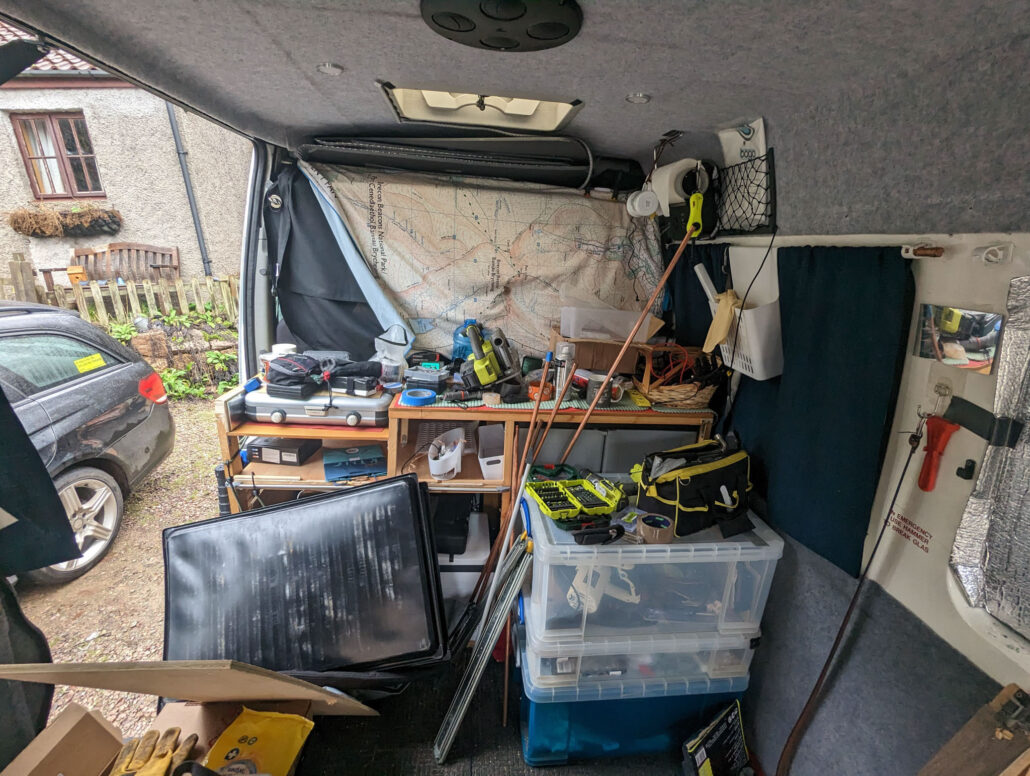
The New Build of my Self Built Campervan.
The first task on my second self built campervan was to remove the old battered plywood floor and then clean the floor and remove the bulkhead. The floor had lots of bolts through it, so they also needed lots of sealing. I used SkiaFlex 522 for this, and made sure it went straight through the holes and made a good seal underneath the van. I then sealed the floor using black Hammerite - black because I already had a tin of it spare of it!
Widows were fitted at this stage (no photos of that - sorry!). Windows are on the front two panels; you can see the one on the right of the van below. A similar side window was put on the sliding door and then two smaller windows were put into the rear third of the van where I had planned the bed area. Finally, two large windows were put into the rear doors.
I then started battening the floor to fit the thermal PIR boards for insulation. I used 25mm battens for the floor as the PIR board I was going to use was 25mm thick; space and height is a premium in a van so the 25mm battens gave good size insulation. I also used 12mm plywood for the floor. Two dogs and lots of walking around etc, meant I wanted a good solid floor to build on. I used SikaFlex 522 AND Hard as Nails to glue the floor battens down. No reason why, except I ran out of SikaFlex 522!
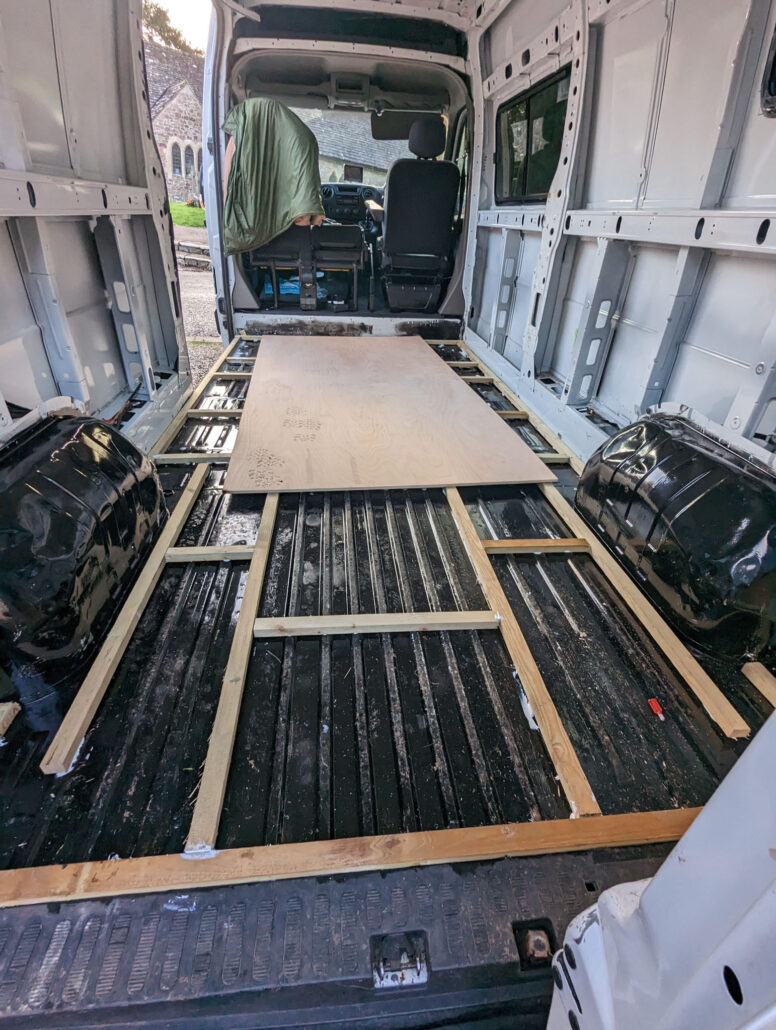
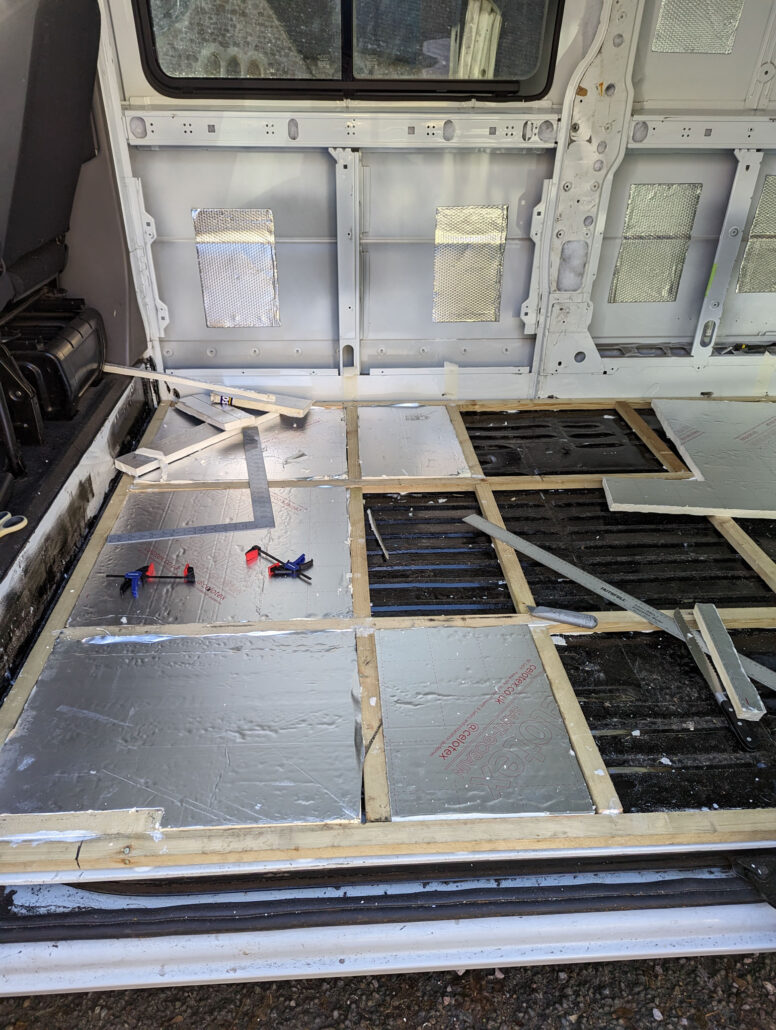
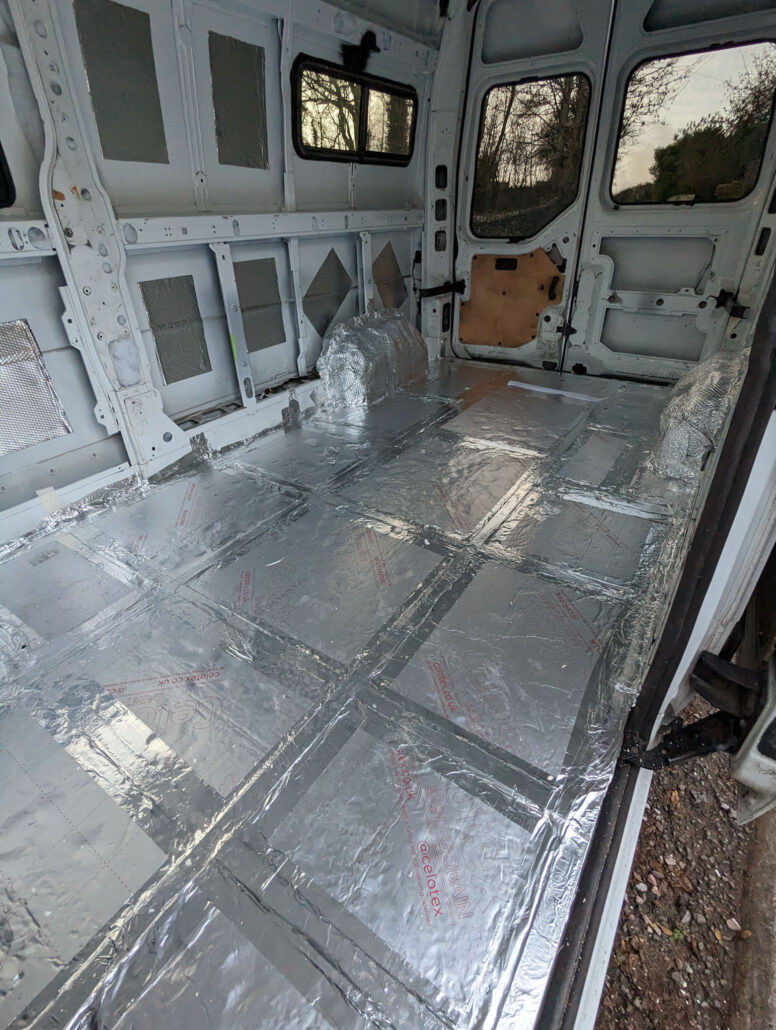
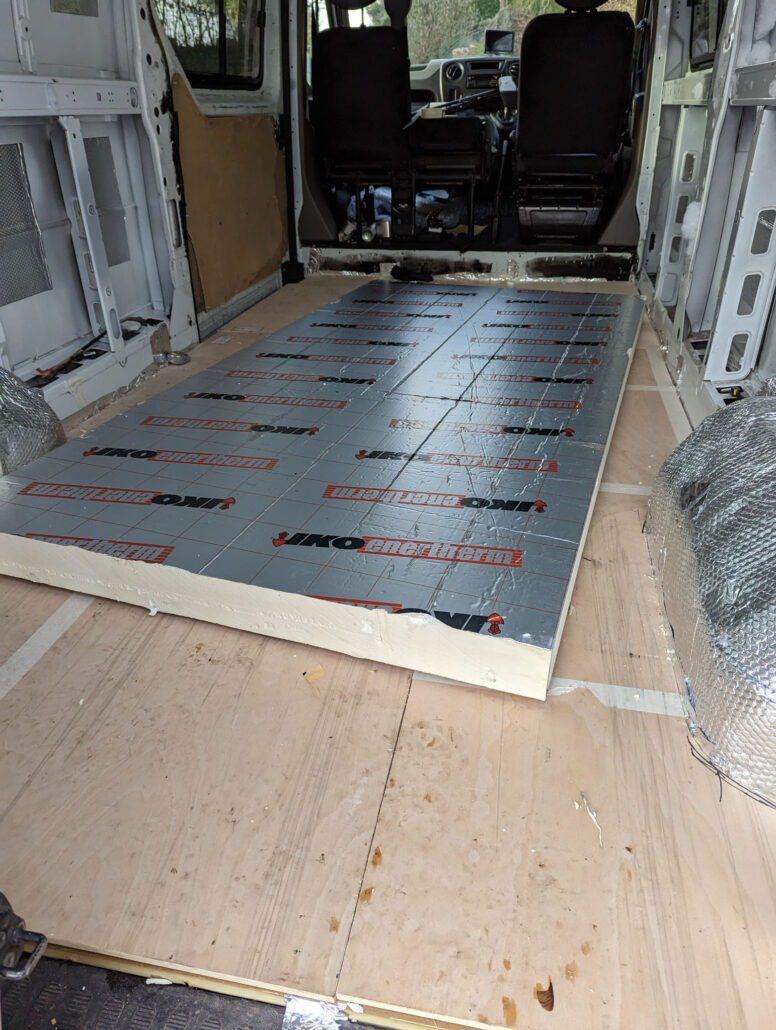
The PIR board was cut and fitted to be a snug / tight fit between the battens. You can also see in the three photos above some silver pads fixed to the panels of the van? They are for sound deadening and helps to stop the rattles of the van. I had loads left from the first build so went over the top in fitting these in the new van!
After the PIR board was laid I then went over all the wood / PIR board seams with aluminium tape to seal it all down, and went along the side of the van edges and did the same, and also covered the wheel arches in sound deadening and foil tape. This goes to form a vapour barrier...which is one of THE most contentious things in the campervan building world!
Good view !
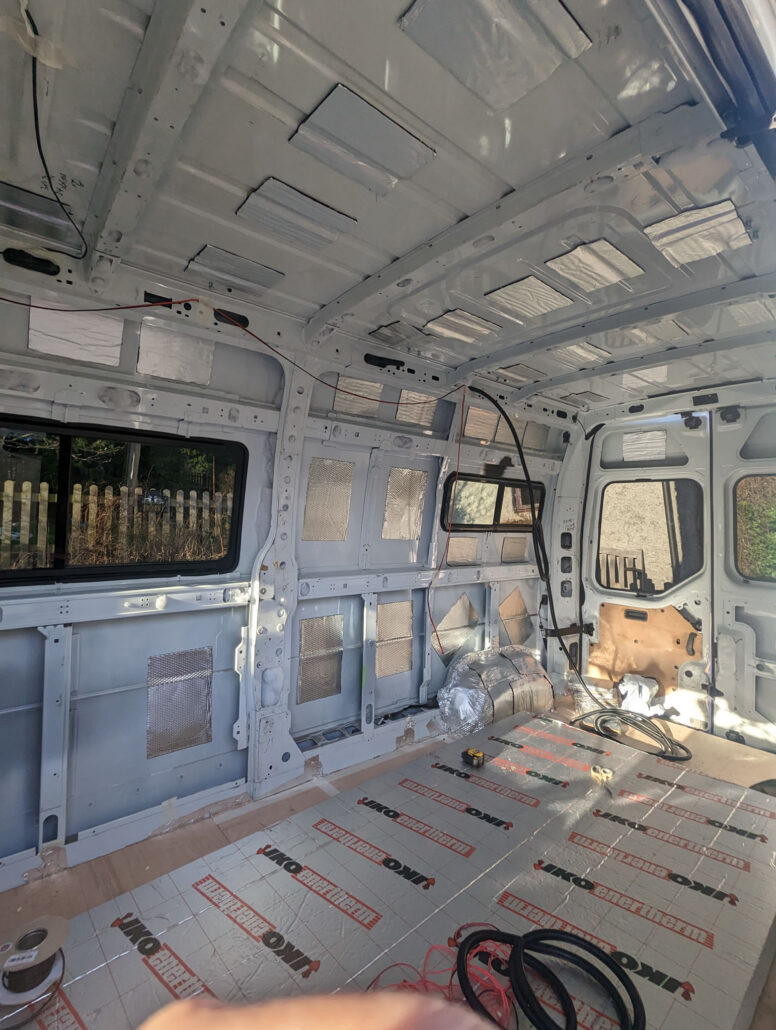
Good view showing the side and rear windows. This large window at the front is the Kitchen Window, and the side window is where the bed will be built. All the windows have dark privacy glass. The sliding door also has a large window, again with privacy glass.
Insulating the van.
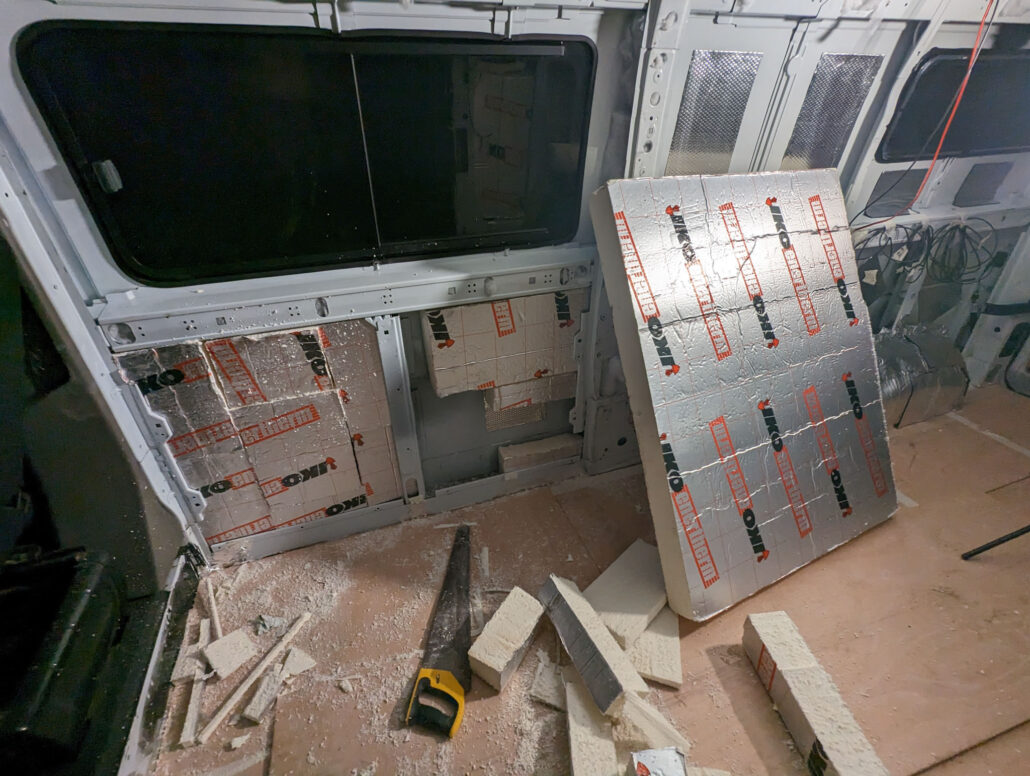
100mm PIR board gives great insulation and goes in easily when the sections are square. When they are not square, it's a pain in the butt. Don't know about other vans but Renault Masters are NOT square!! Also, many people said to use an electric kitchen knife to the cut the PIR board...I much preferred to use a wood saw! So much easier.
Also amongst this, the weather wasn't as nice as it could be, as you may expect from the weather in January and February! The rain held off for the most but the snow didn't!

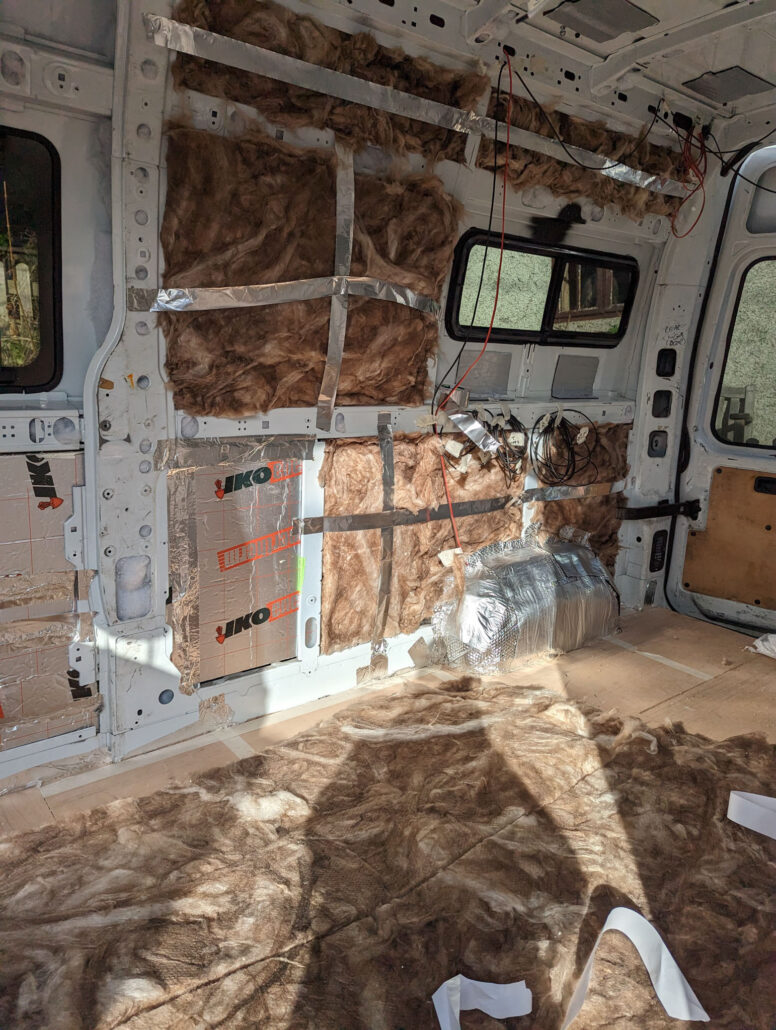
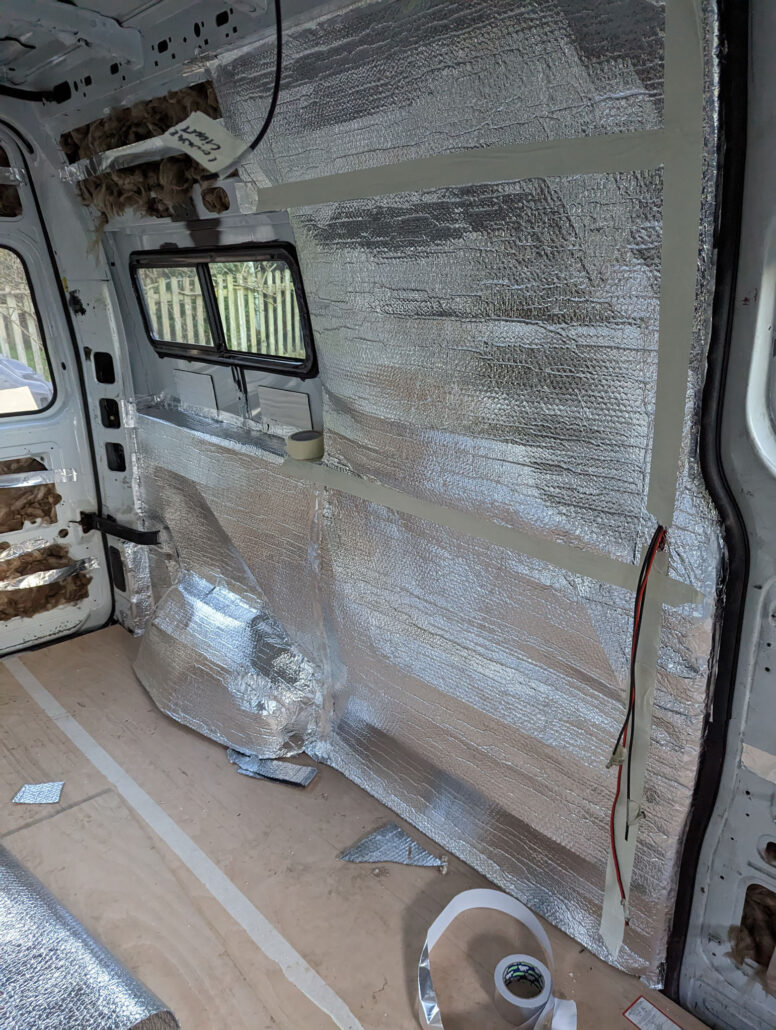
Once the PIR board was done in the areas that were easier to get to I used Rockwool for the upper panels as well as bits of PIR board where possible, insulation on any van is going to be a question of doing what YOU want and what YOU think best. I did my research and I'm happy to with the Rockwool choice! The aluminium tape stuck everywhere was to keep the wool in place. All the cavities were filled with Rockwool - BUT not stuffed tight. Rockwool needs an airspace to work so ramming and cramming it in is just pointless.
Over all of that, I used large sheets of plastic bubble foil type thing! Again this provided more insulation but also acted as a vapour barrier. I wasn't bothered about trying to make the barrier 100% vapour proof by the way. My idea was to make it as good as possible in the time I gave myself for the build (8 weeks) and if there were a few gaps here and there then it would just give the van breathing space! So far, 6 months into living in it, it's worked really well.
Heating
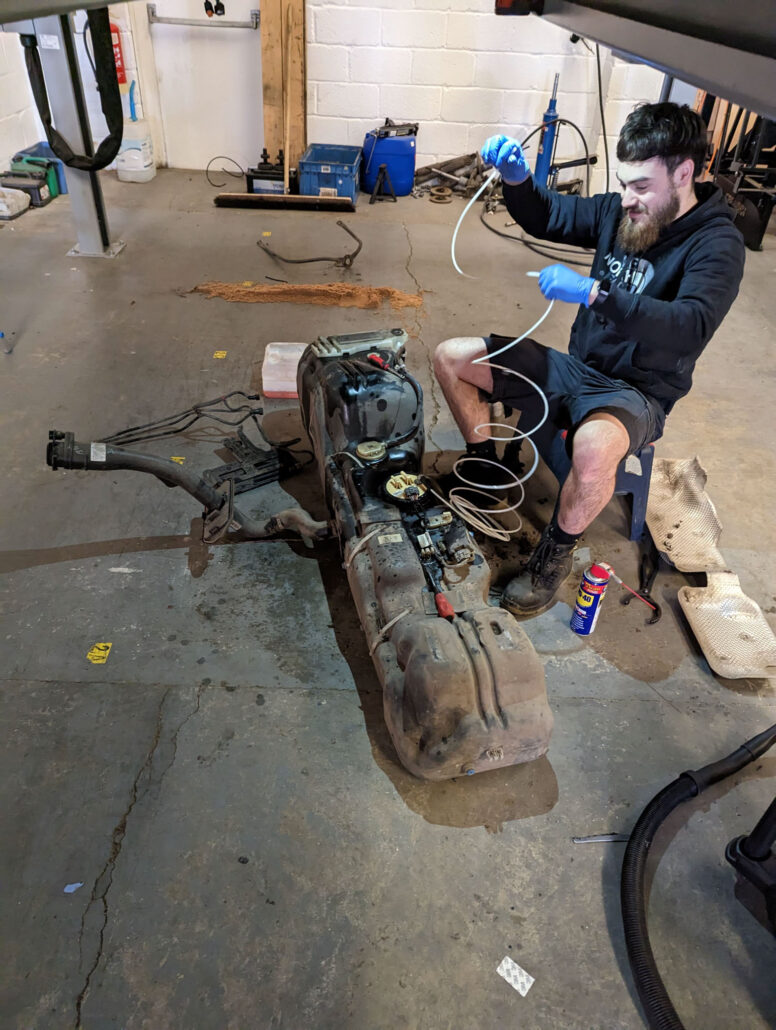
I wanted a heater. No. I NEEDED a heater! I also didn't want to have the heater or the diesel fuel inside the van, so opted to pay for a professional installation. I had a 2Kw diesel heater installed underneath the van, just behind the driver's seat and the fuel line was tapped into the main fuel tank, meaning I don't need to worry about fuel for it as long as I have fuel to drive the van!
I've not had a hard winter to test the 2kw heater yet, but I know there is space under the van to fit a 4Kw should the 2Kw not perform as I hope.
Ventilation and SkyLights
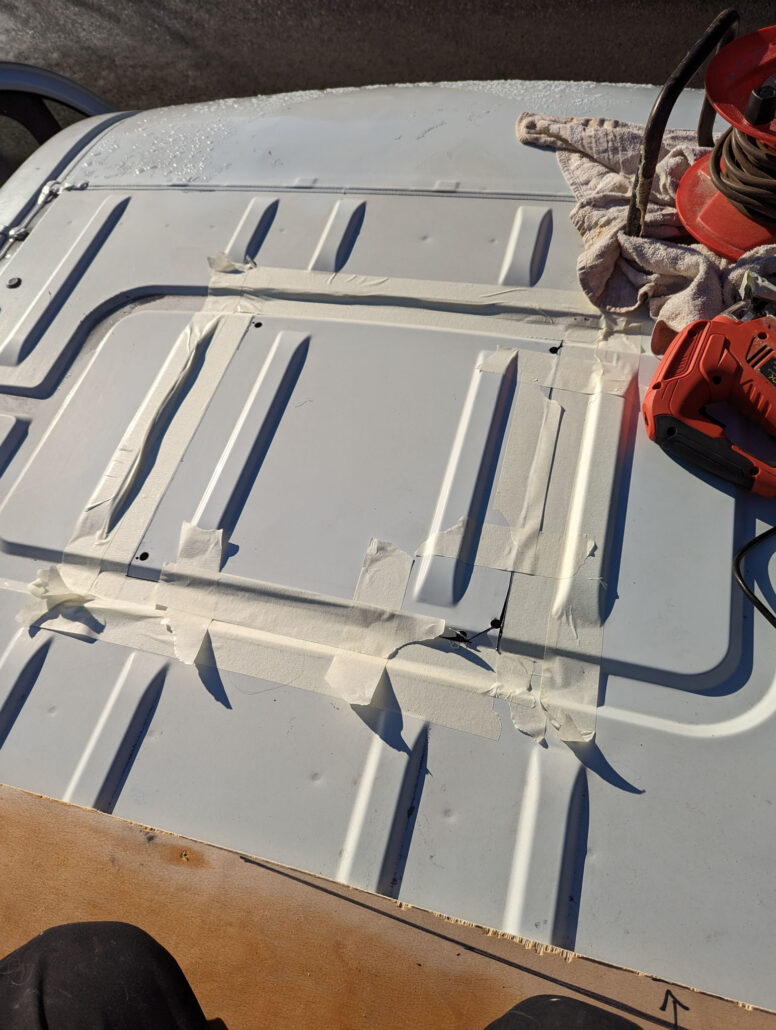
The previous van didn't have any active ventilation, and this was something I really wanted in the new van. It helps to avoid the build-up of condensation and also to freshen the air inside the van. Additionally, it helps with a positive airflow for the two dogs!
Along the way I also fitted a Unistrut either side of the van, using the pre-drilled holes and RivNuts. This would give me a firm based for the large solar panel I had planned.
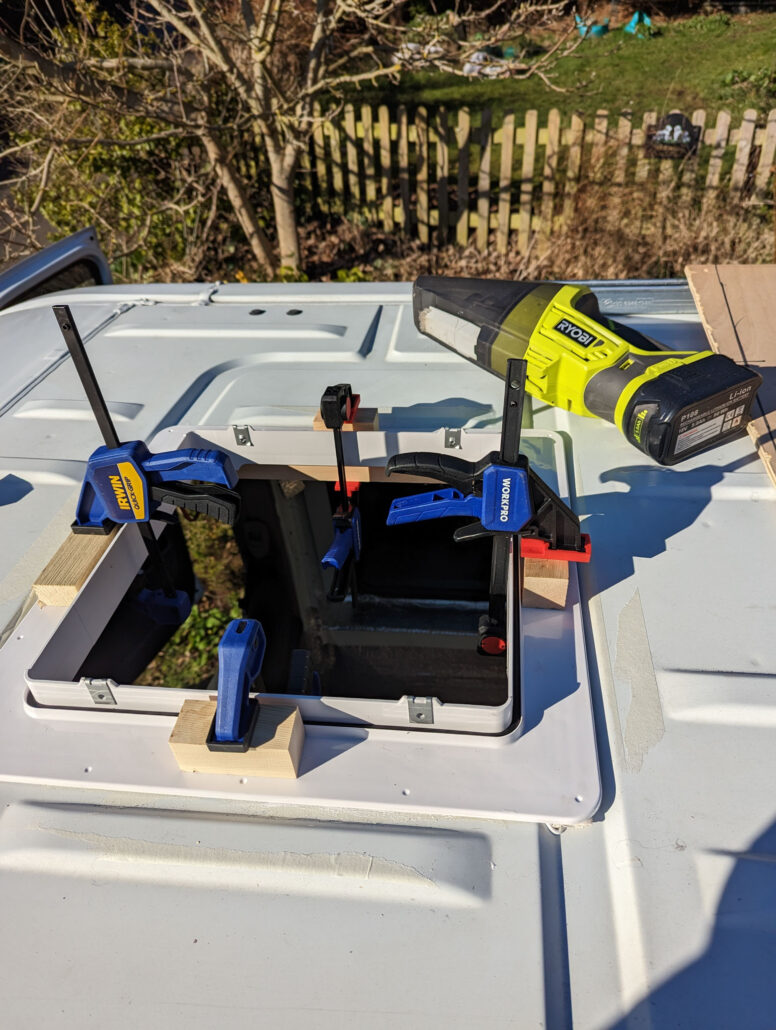
I used a MaxxAir fan at the front and a MaxxAir Skylight at the rear. The skylight comes with a light, bug screen, and blackout blind. It also opens to very close to 90', so it's a great thing to poke your head out of. The MaxxAir fan is over the kitchen area, and the SkyLight is over the bed area.
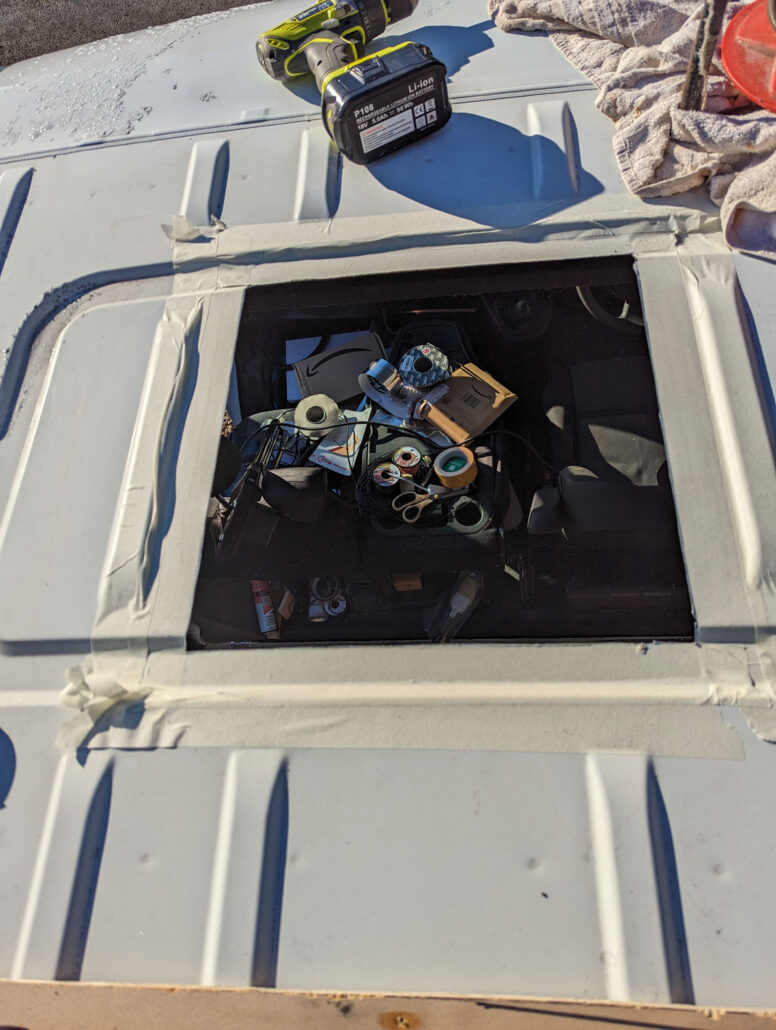
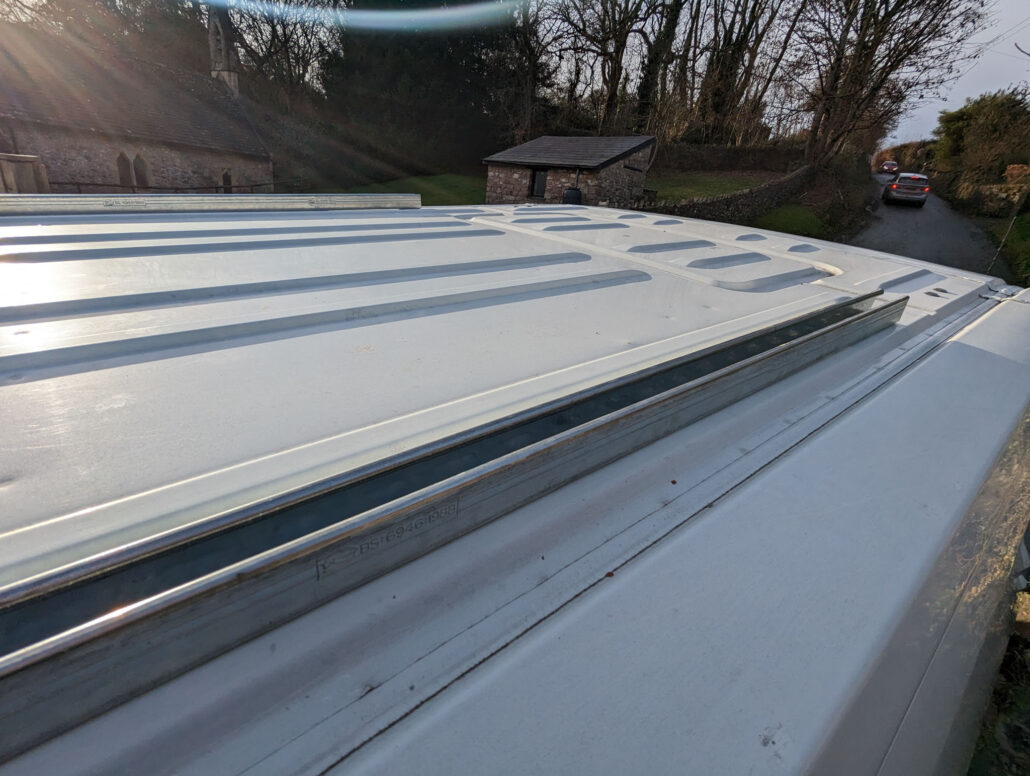
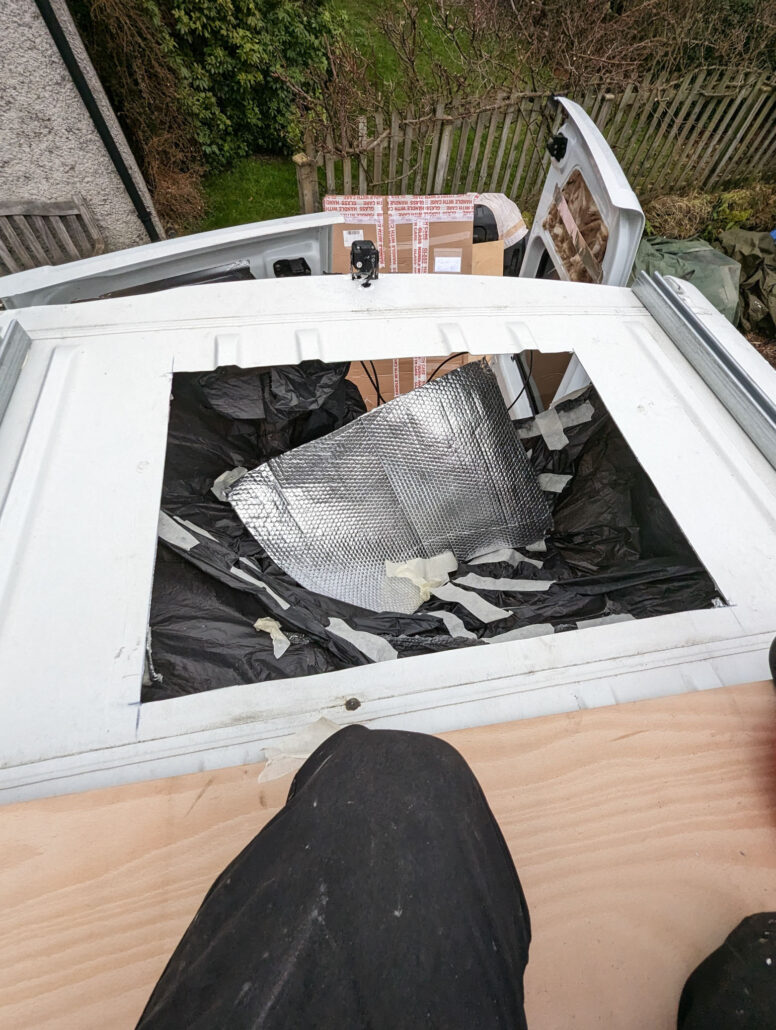
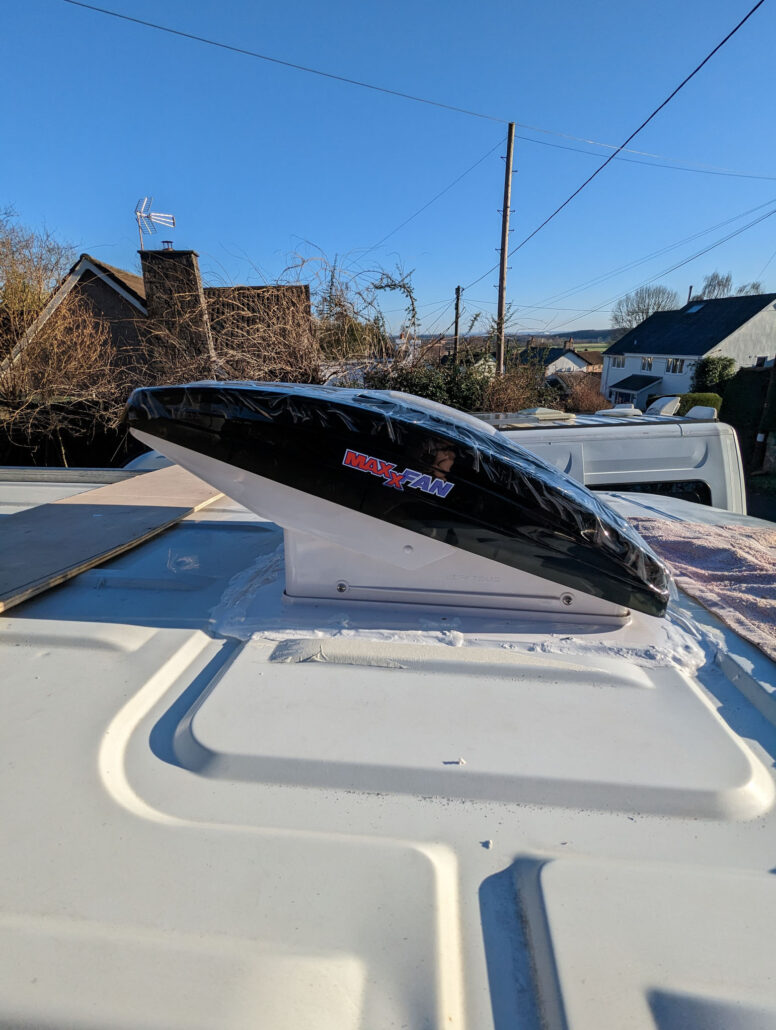
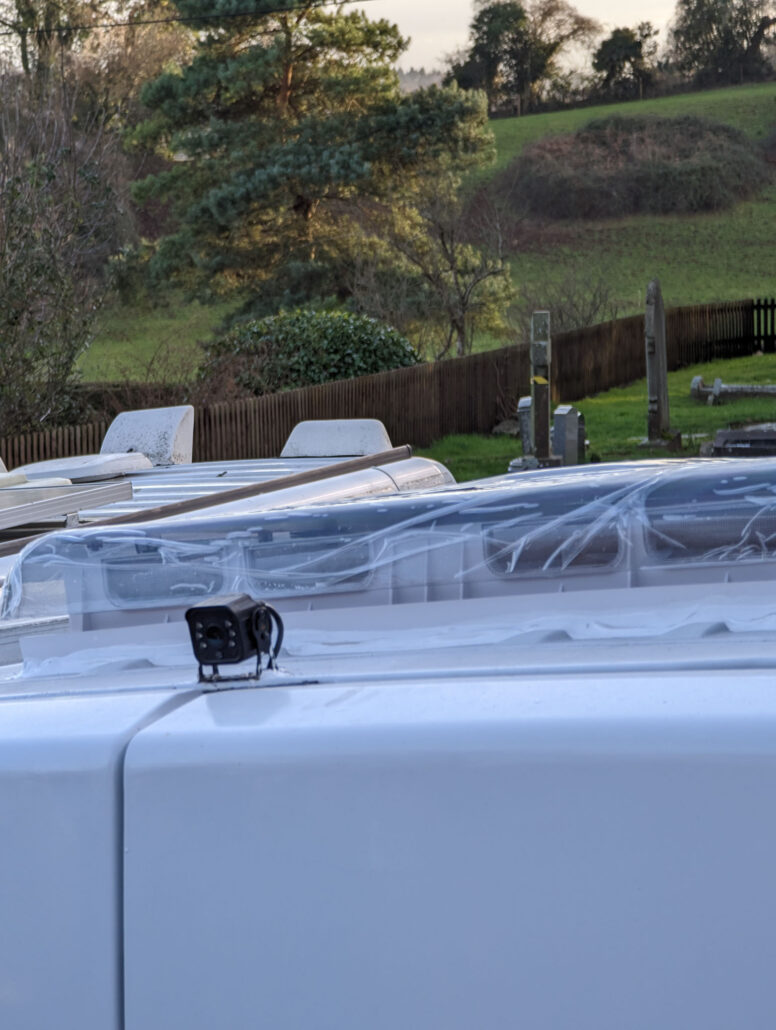
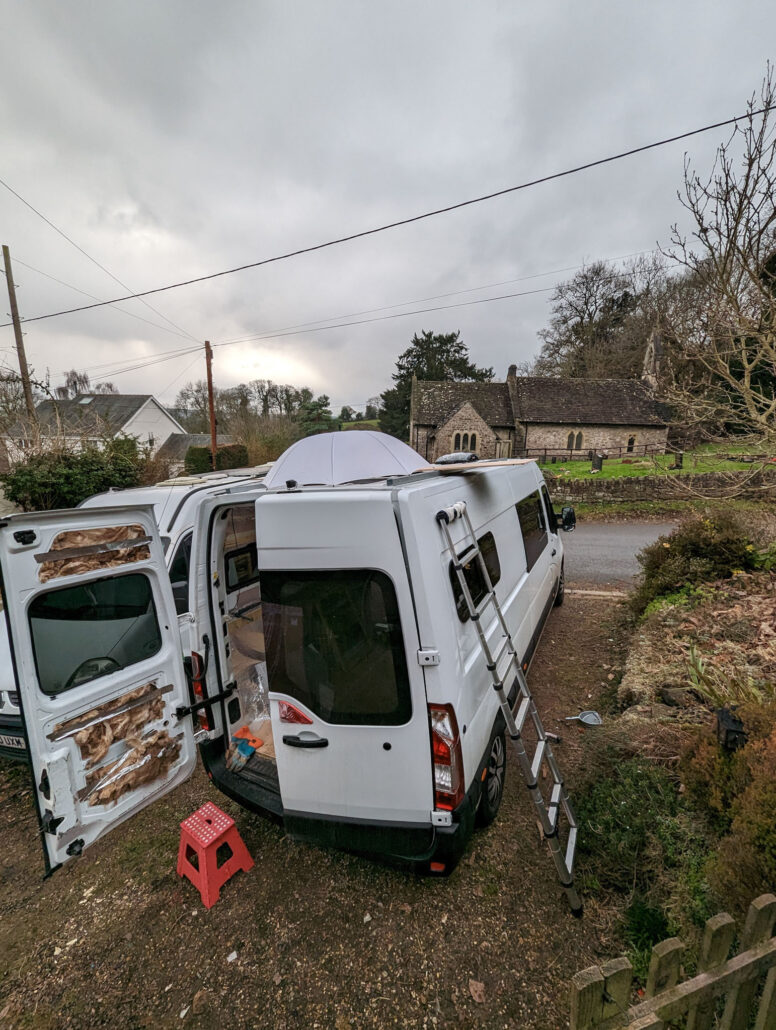
Finishing the roof insulation
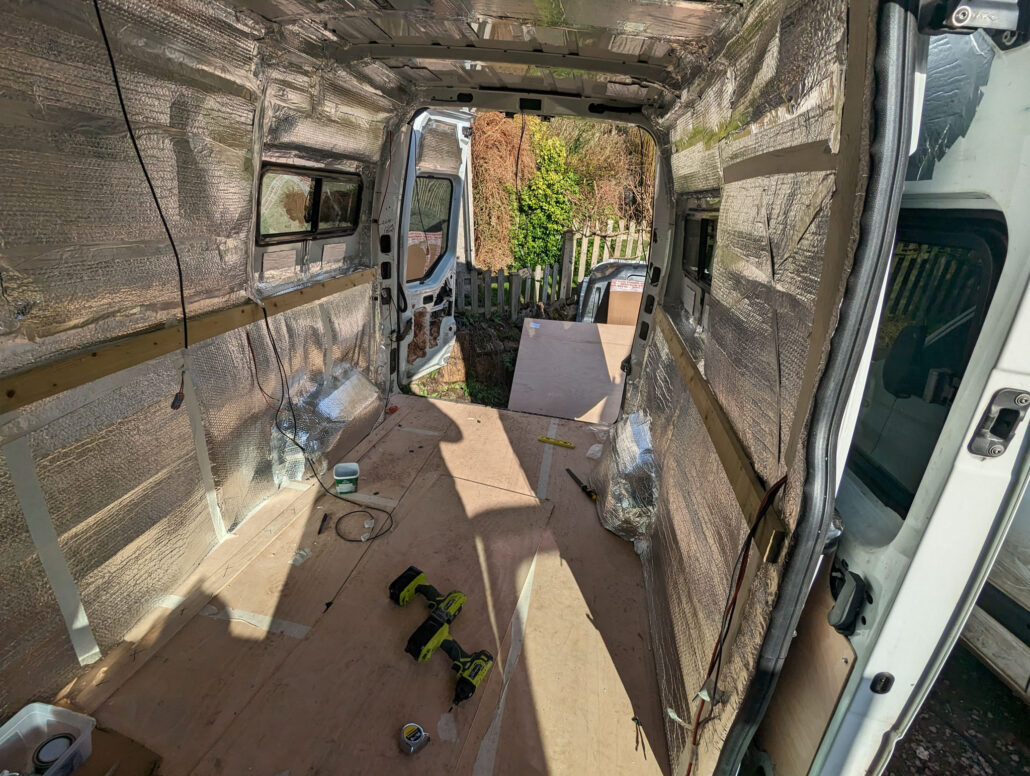
I used a mix of PIR board and Rockwool for the roof, with aluminium tape and then covered in sheets of foil bubble wrap insulation as a vapour barrier.
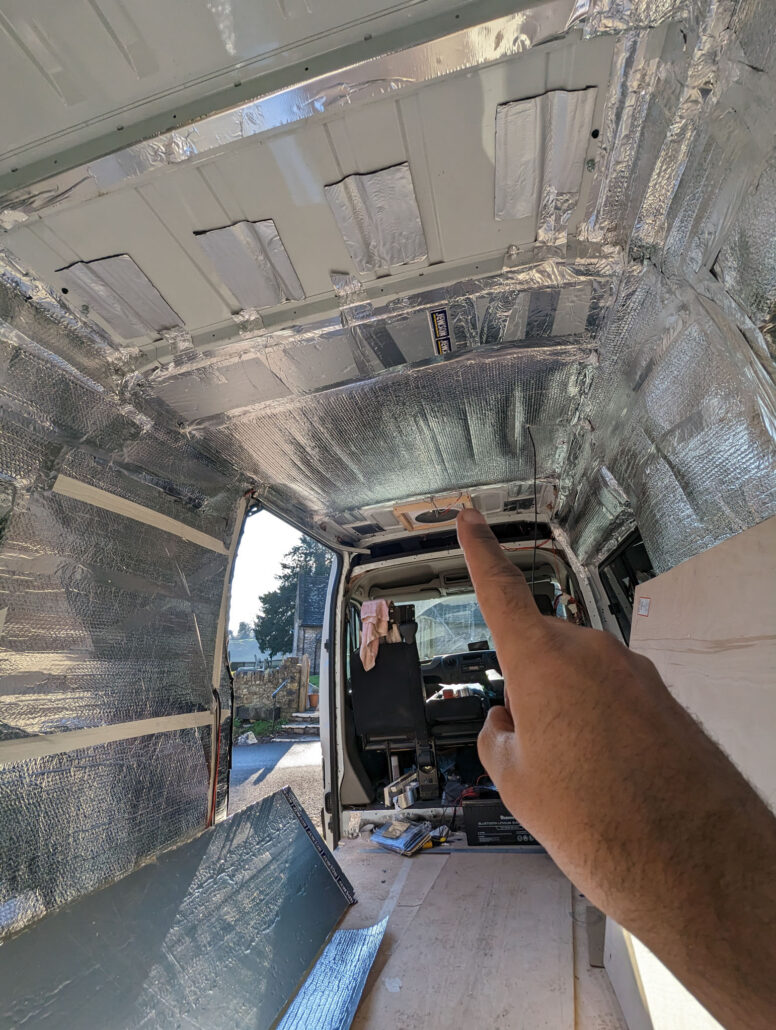
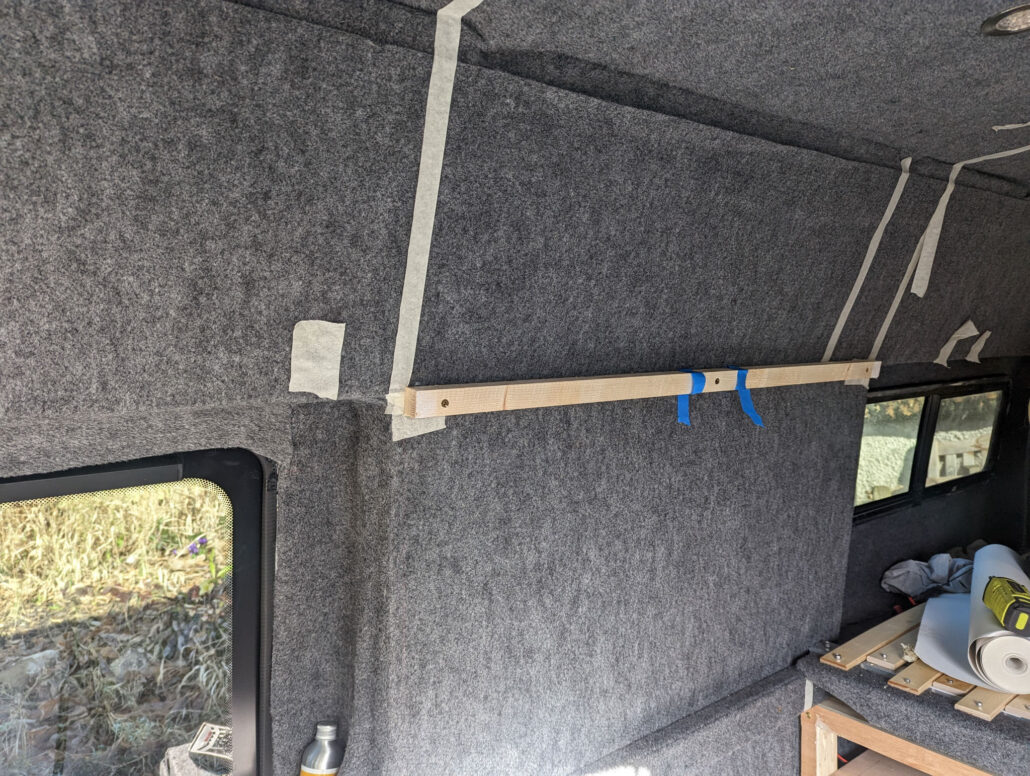
The masking tape on the sides of the vapour barrier shows where I want to put the battens to attach the plywood wall, too. I've left bits and pieces of that tape in the finished (if any van is ever finished!) to help me when adding stuff to the van - I know where the battens are!
Fitting the wall battens and the bed supports - Self Built Campervan
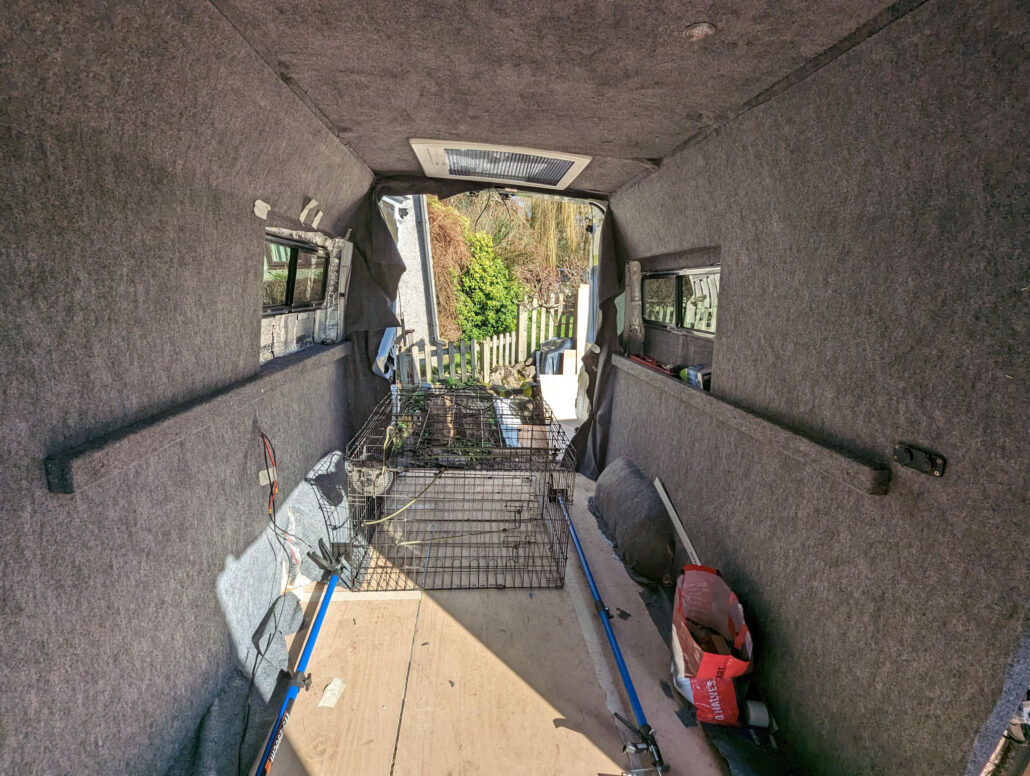
For the insulation on this self-built campervan to work fully, it's important to have an air gap - hence I put the foil bubble on, then screwed wood battens through that and into the van's beams - making very, very careful not to go through the sides of the van! I used self-tapping bolts to do this and countersunk the oak beams. You can see in the picture below the passenger side horizontal beam, I think it was oak left over from the first van build. You can also the rear window and the recessed area I left. This was vital for me, I'm 6ft and when alone in the van I can sleep width ways quite easily.
Measurement of the beam's height, the window recess, and the need to put dog crates under the bed were among the more complicated aspects of the design. Add in the mattress height, and it all got complicated but worked out excellently. If you have dogs, I highly recommend using dog crates for them to travel in. They also provide a safe home when parked up.
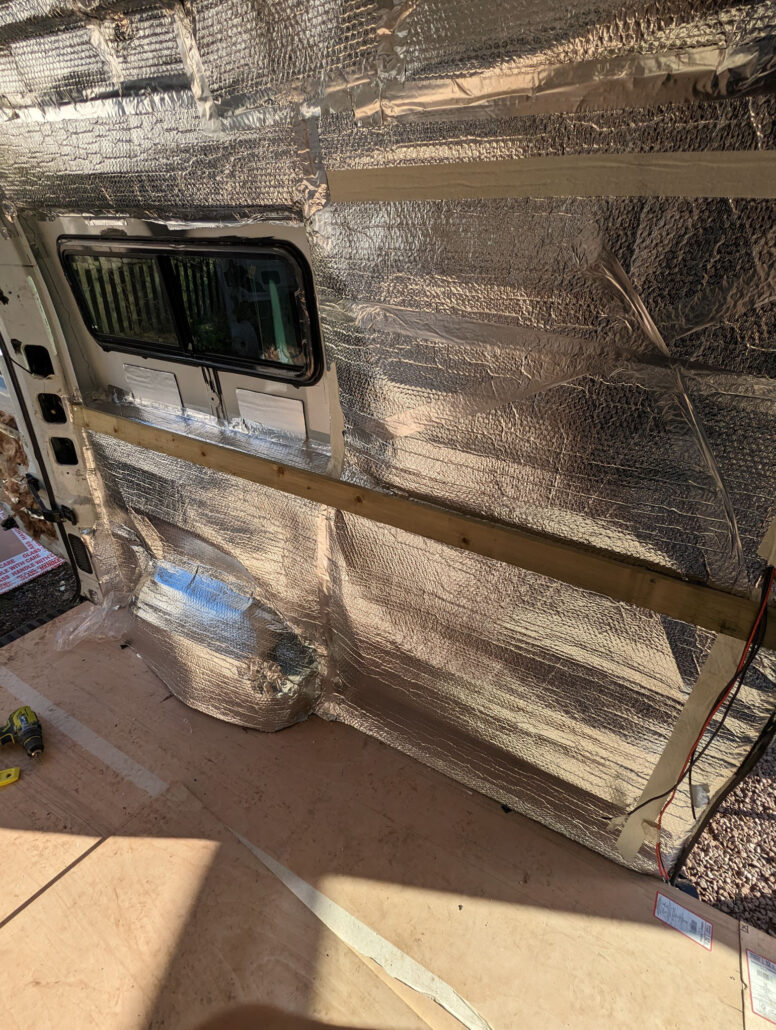
Get the weight sorted at the start!.
As an aside, I ran a spreadsheet of the weight of the majority of the materials when building my self-built campervan. The whole van, fully laden, can only be 3.5t, and that includes fuel, water, food, clothes, dogs, passengers, and my camera gear.
I wanted to finish the build with the van under 2.8t, including fuel, water, and me. It actually came in at 2.9t on the first weigh-in, so I was chuffed with that.
I'm always astounded when I see van conversions and what is included in the finished build, and I keep thinking that the weight cannot be legal! Is that just me?!
Once fully loaded with 2 x adults, 2 x dogs, full water, full fuel, full AdBlue, cameras, clothes, and food for 3 days the total weight is 3.2t; very happy :-)
Finishing the battens on the walls and roof
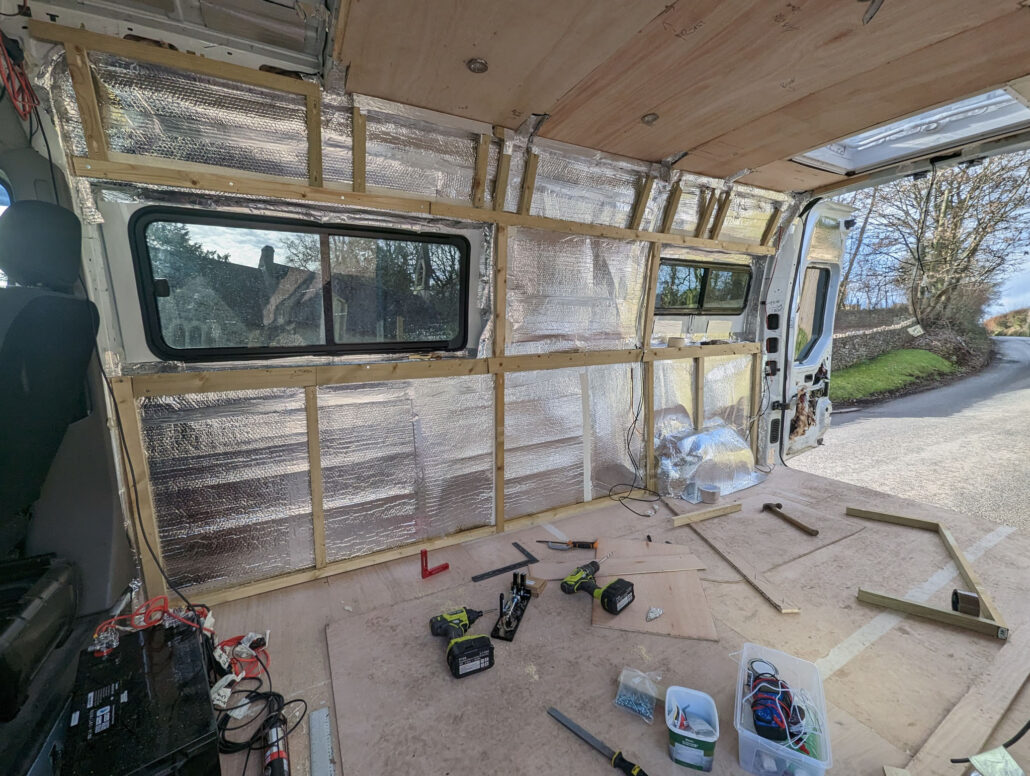
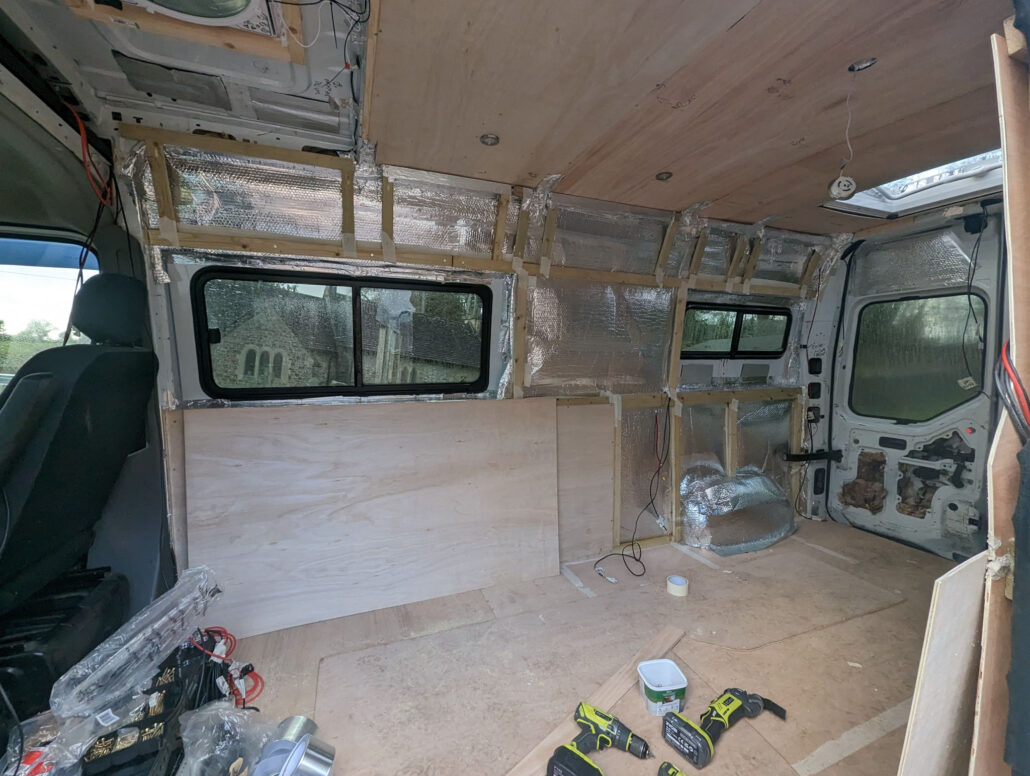
After the foil bubble wrap was all over the walls, it was onto the battens. Again some pre-thinking is required so that you know what kind of wall you are going to use (plywood or tongue and groove) and where you will be putting things like storage cupboards that will be fixed to the walls. I didn't want tongue and groove for the weight - the two dogs alone weigh in at around 90kg together so T & G was going to be too heavy.
I opted for 5mm plywood and 25mm battens for the walls and 25mm battens and 3mm plywood for the roof.
The battens were fixed together using pocket screws and to the van itself, I used self-tapping screws into the van beams. That air gap between the silver foil insulation and the plywood not only gives the van room to breathe but also increases the insulation properties. I think!
Carpeting the interior
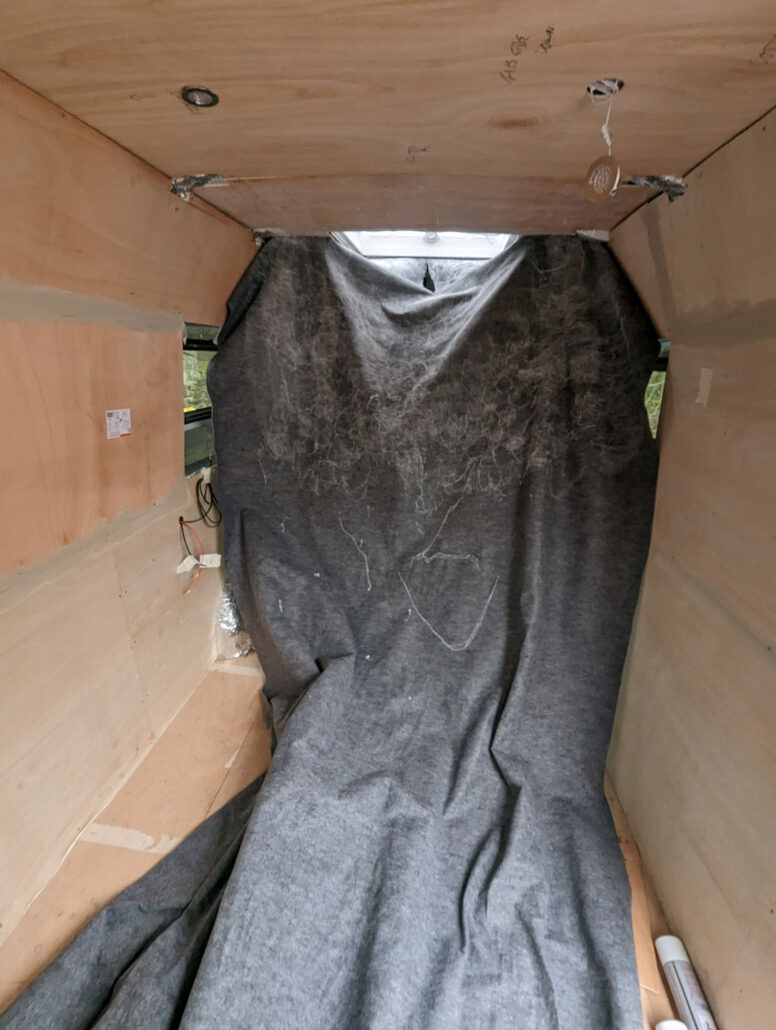
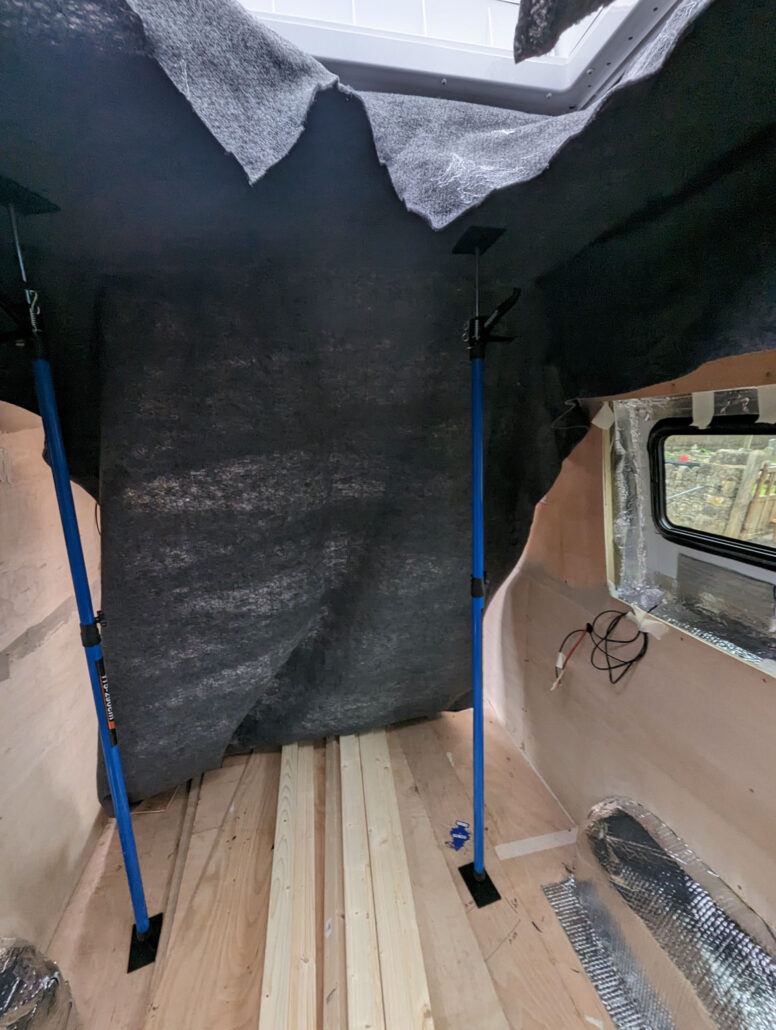
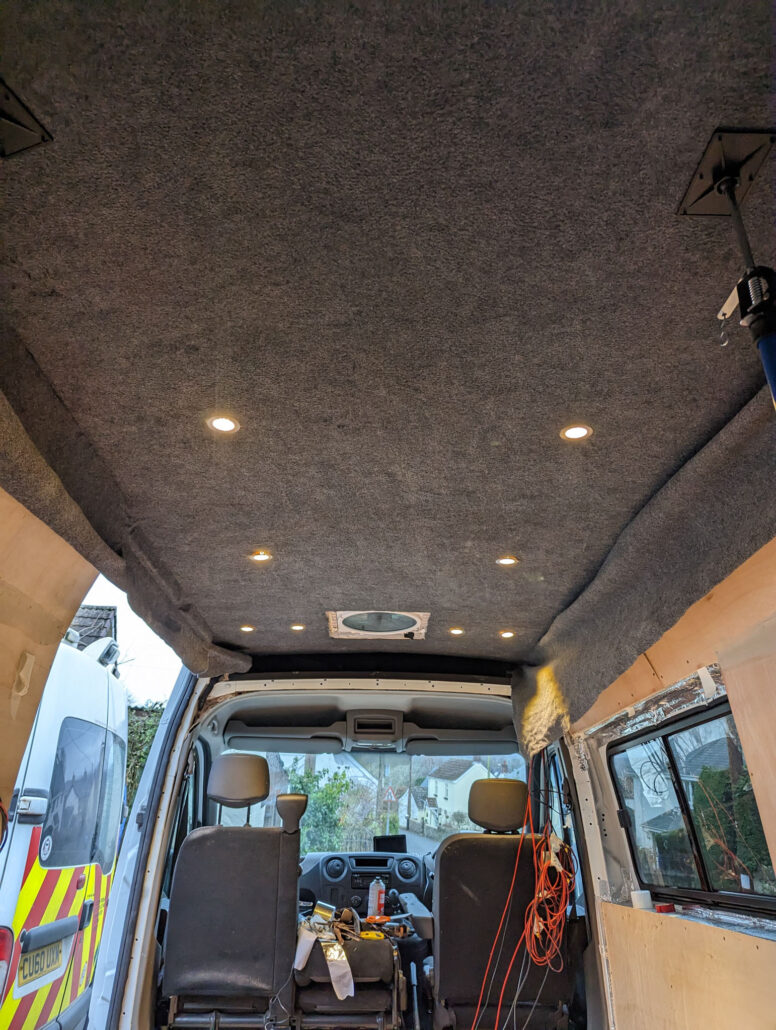
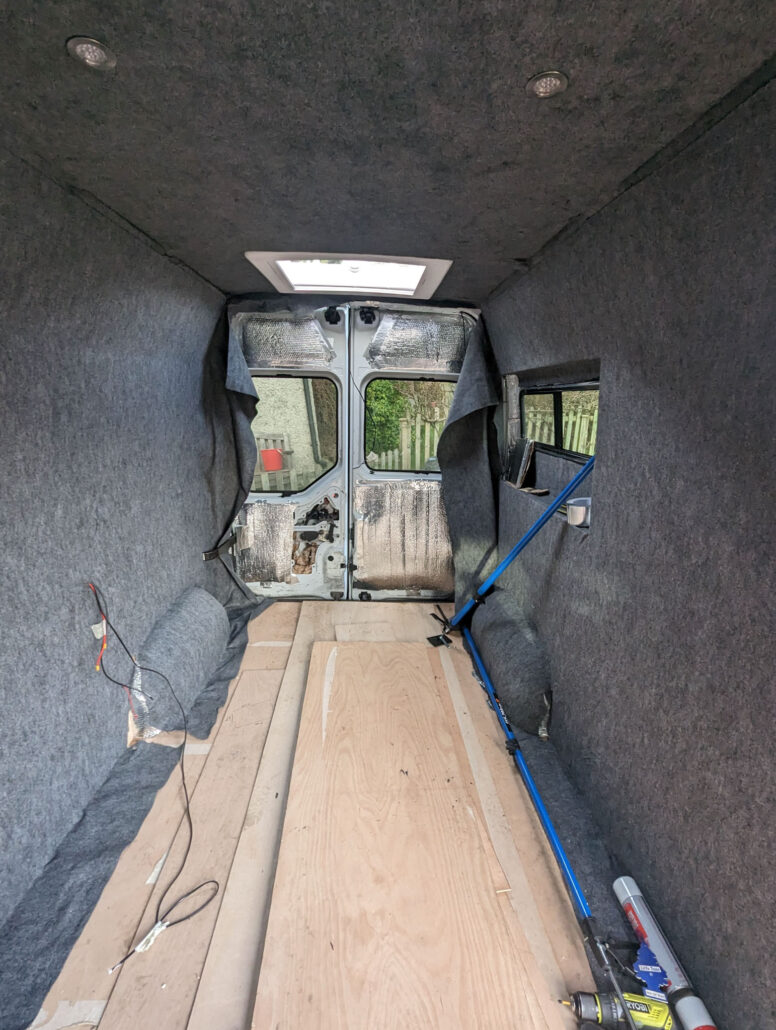
Remember this was a self-built van? THIS was a total PITA to do by myself!! However, the carpet gives a nice cosy feel to the van and helps to deaden the sound when inside the van. Dary grey was used...as it matches the dog's hair colour (and mine!) so any story hair wouldn't show!
The vinyl floor...
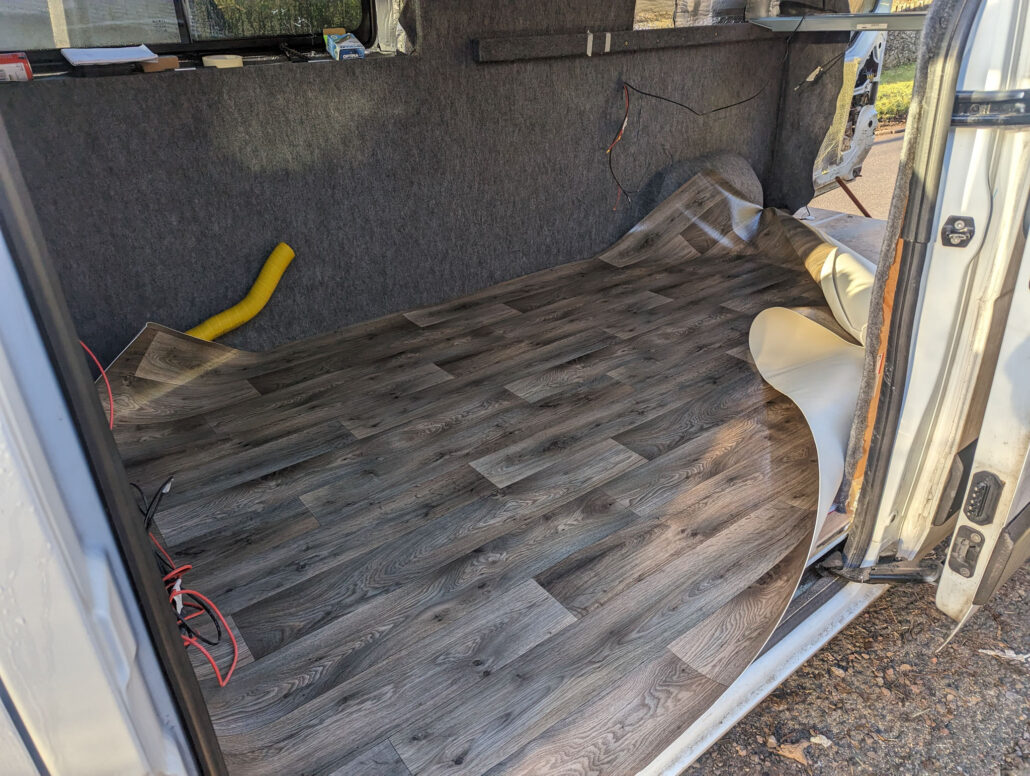
Next was the vinyl floor. Chosen to match the rough colour scheme but also to be hard wearing (lots of foot fall, two dogs etc). My idea for the van was to design it so that has a roomy and spacious feel and can have two adults and two medium dogs (I have Bearded Collies) inside chilling when its raining outside or on a cold evening and still be cosy and enough space. In fact the dogs actually have more usable floor space than adults do!
The Ded Supports and Rails
The Bed. The bed. The bloody bed.
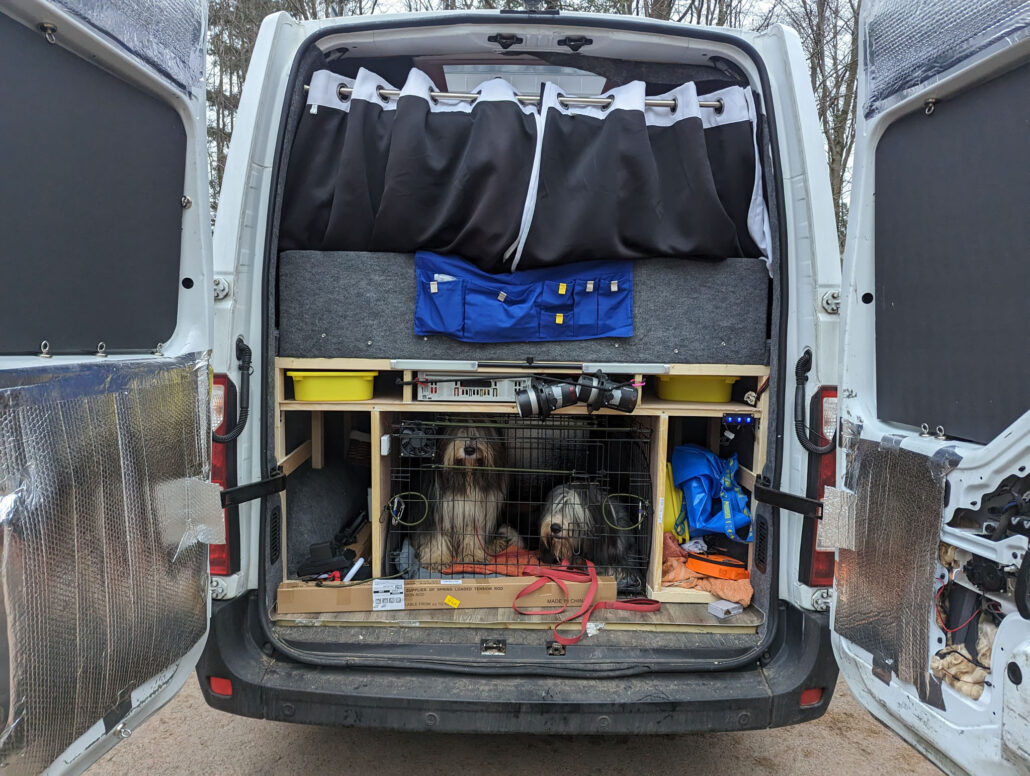
I wanted a slide-out bed that would fit over the two dog crates and with a little bit of space for some shelving for personal stuff in the main cabin and camera gear in the rear. This took me about 5 days to work out how I was going to do it.
Because the dog crates were a fixed length of 4ft long (give or take) and I wanted a 6ft 2" slide-out bed I couldn't just make a standard slide-out bed that slid out 50%. I had to make a slide bit that came out 2ft 2"
I also wanted to use Ikea struts for the bed as they would provide a bit of extra support, are lightweight and offer good airflow to avoid damp and mould on the mattress.
As you can see in the photos the beams to hold the Ikea beams (Skorva beams by the way) would be attached / slide to a thick beam that was also bolted to the wall batten...that was screwed to the side of the van! The bed wasn't going anywhere :-)
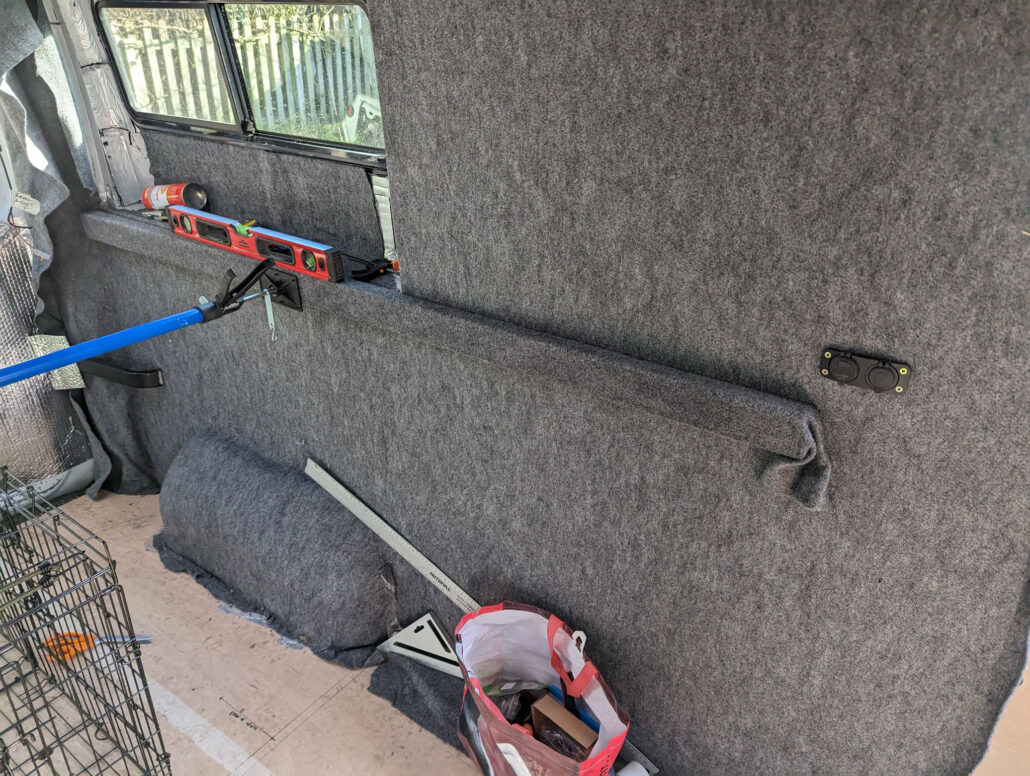
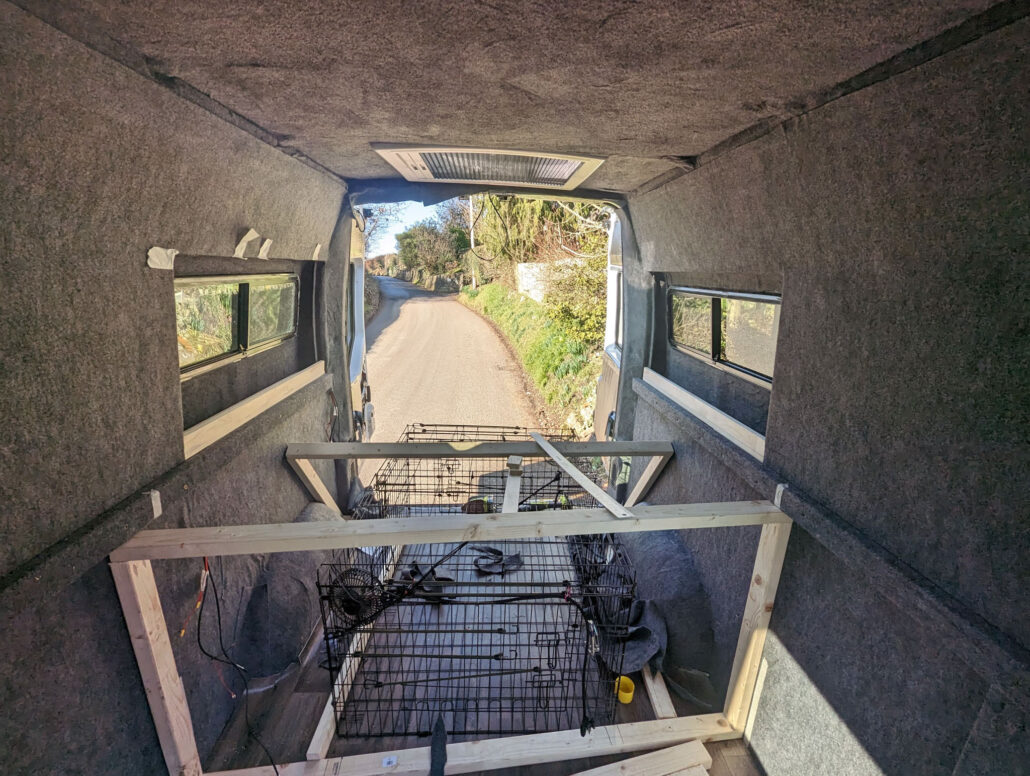
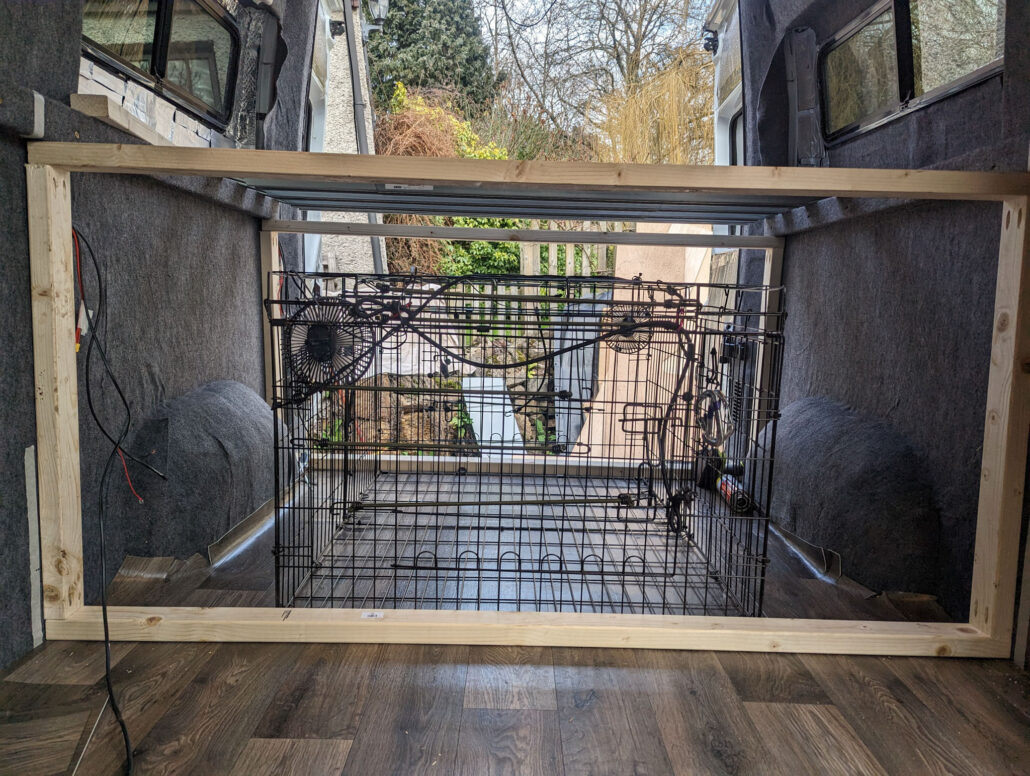
Once those horizontal support beams were in place, I could put the dog crates in situ and then build a wooden frame around those to give me the storage and shelving I wanted. I over-engineered the bed frame deliberately. I had used the same bed frame design in the first van, and that frame had saved me from getting really injured in the accident in December - the wooden beams under compressional vertical and horizontally took the brunt of the accident and stopped the van beams from caving in and thus crushing me. The dog crates after that accident were fine...the beams were split in one or two places and the van supports are dented inside. That wooden frame would also have kept the two dogs perfectly safe in an accident as well. This was one area where I wasn't bothered about the weight saving!
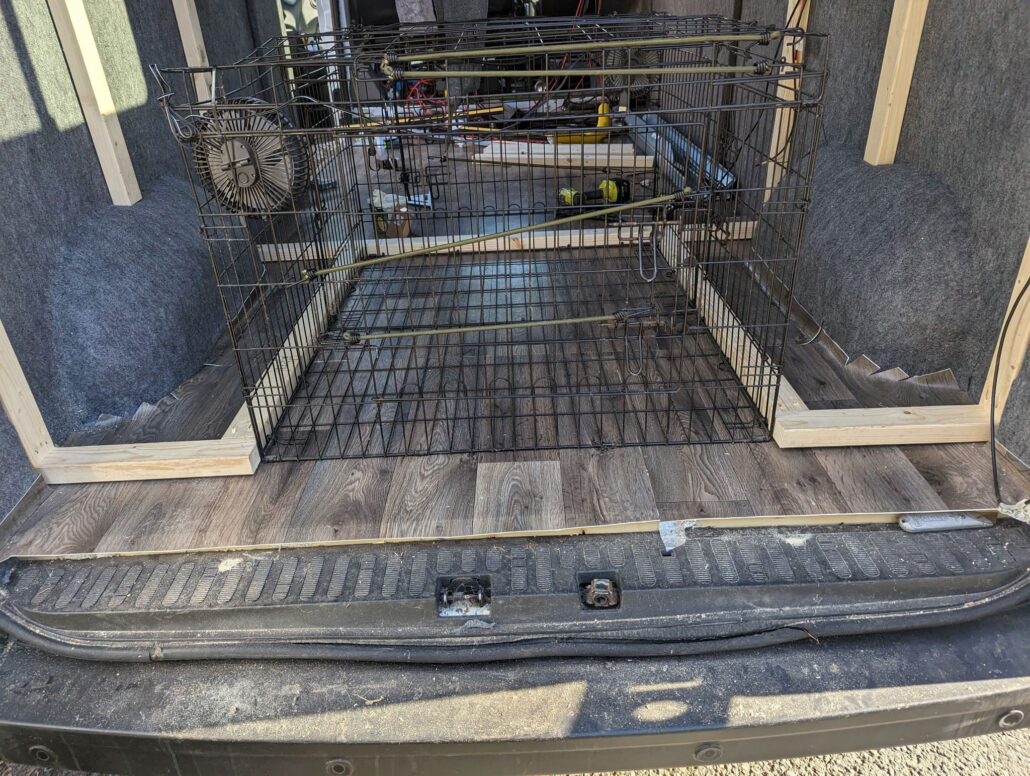
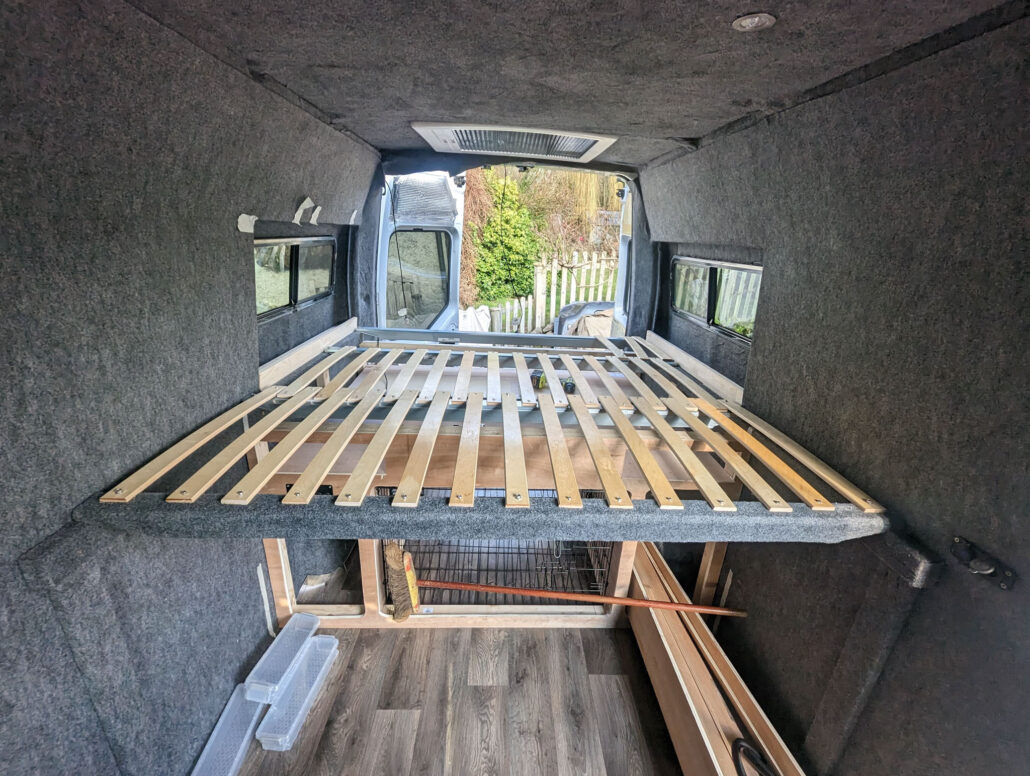
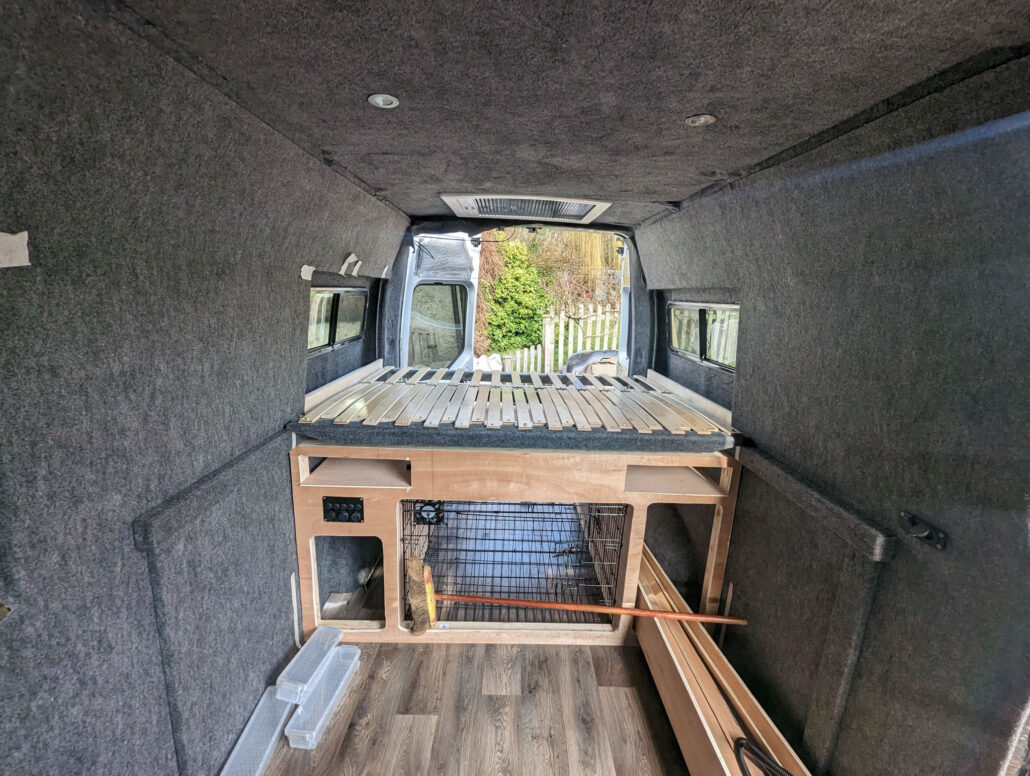
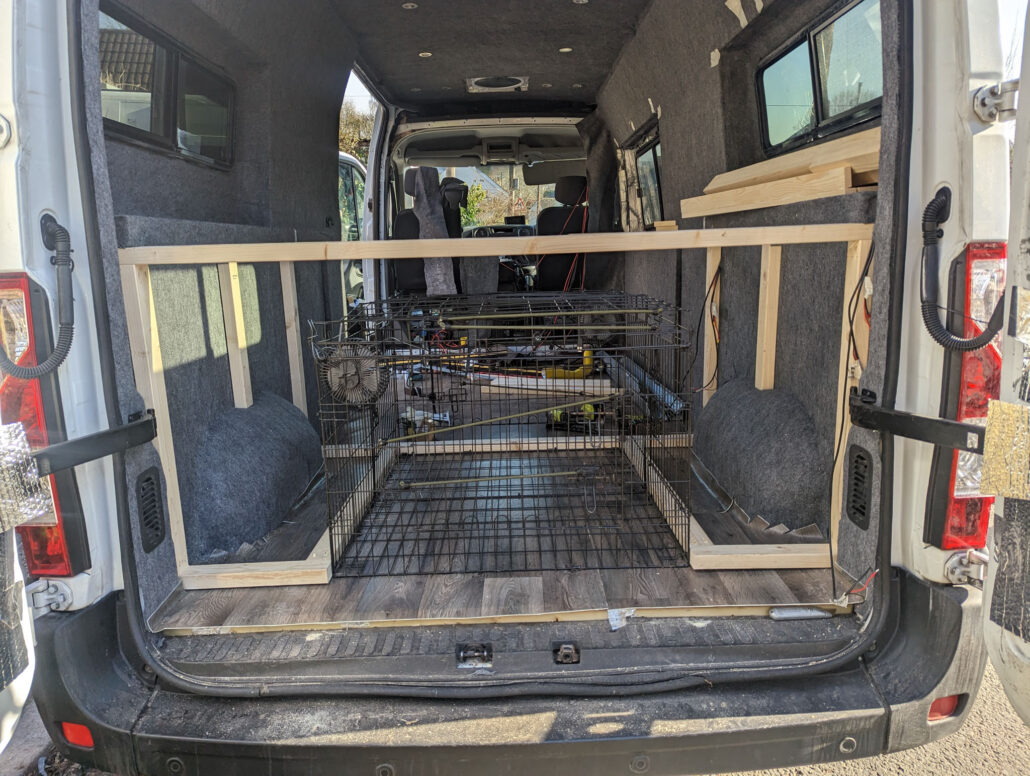
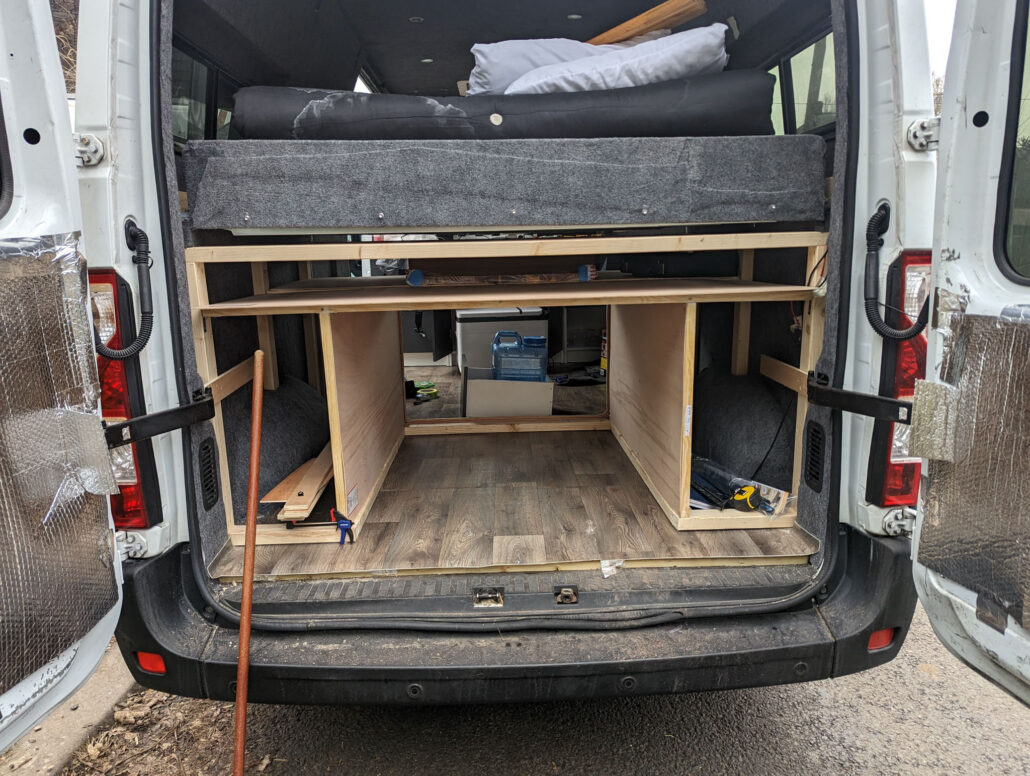
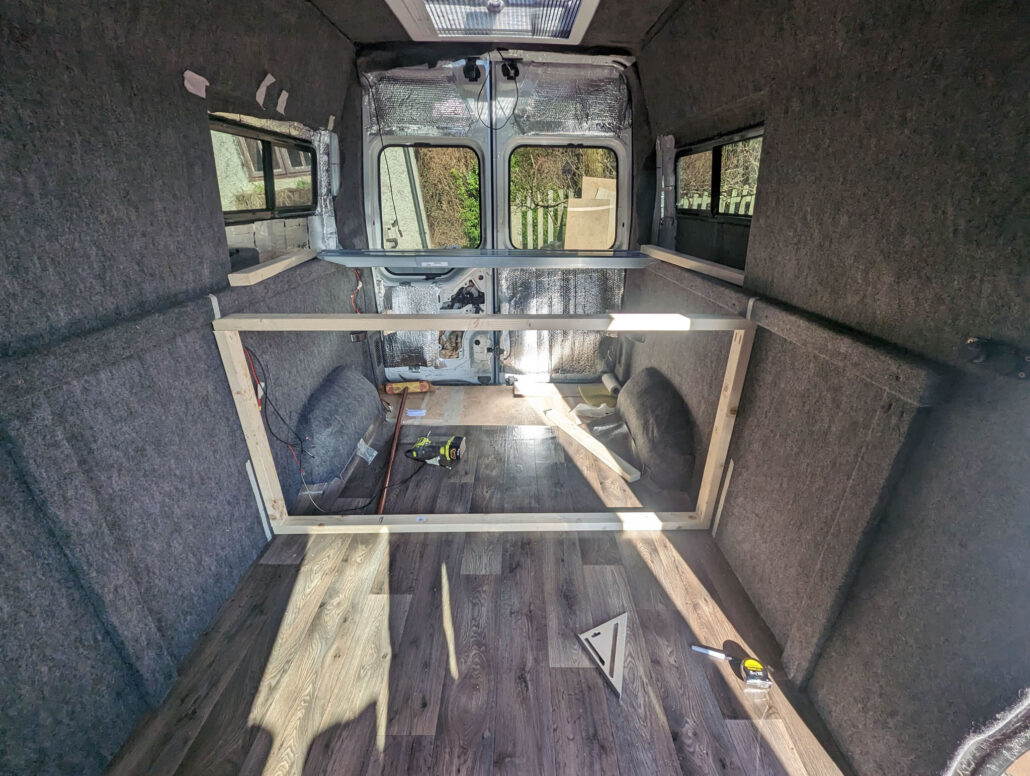
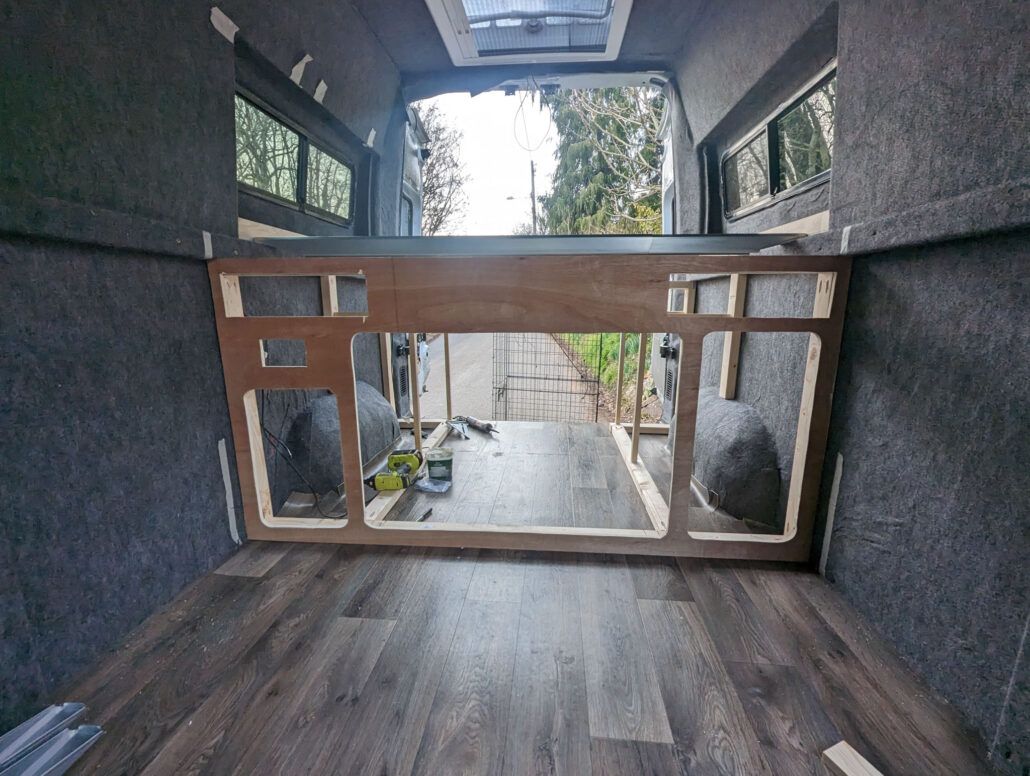
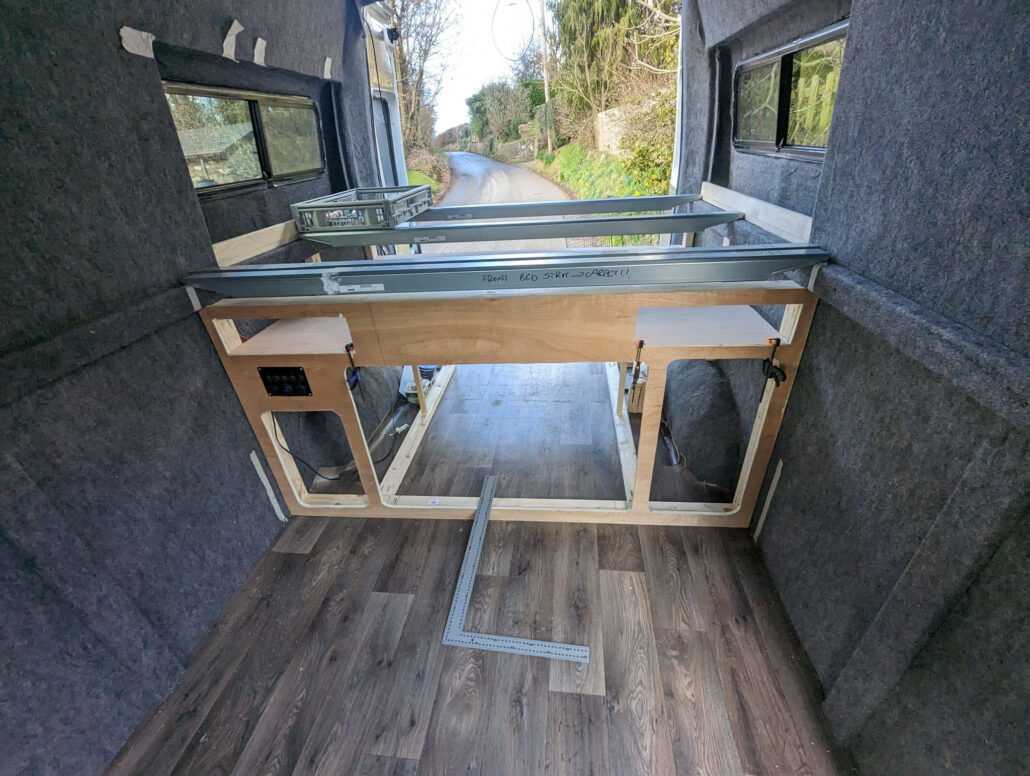
The bed / crate area was also designed so the dog crates can be removed for cleaning and allow longer items to be carried inside the van should I need them.
So I used a total of four Ikea Skorva beams. Two are fixed and two move.
Additionally, the dog area has a daylight-balanced LED strip to give the two dogs some light as well as two 12v PC fans. One fan at the back pushes air into the crate and the one at the front draws air out of the crate giving a positive airflow. Used with the MaxxAir fan it creates a nice throughout of fresh air inside the van.
Self Built Campervan - Finishing the Kitchen area.
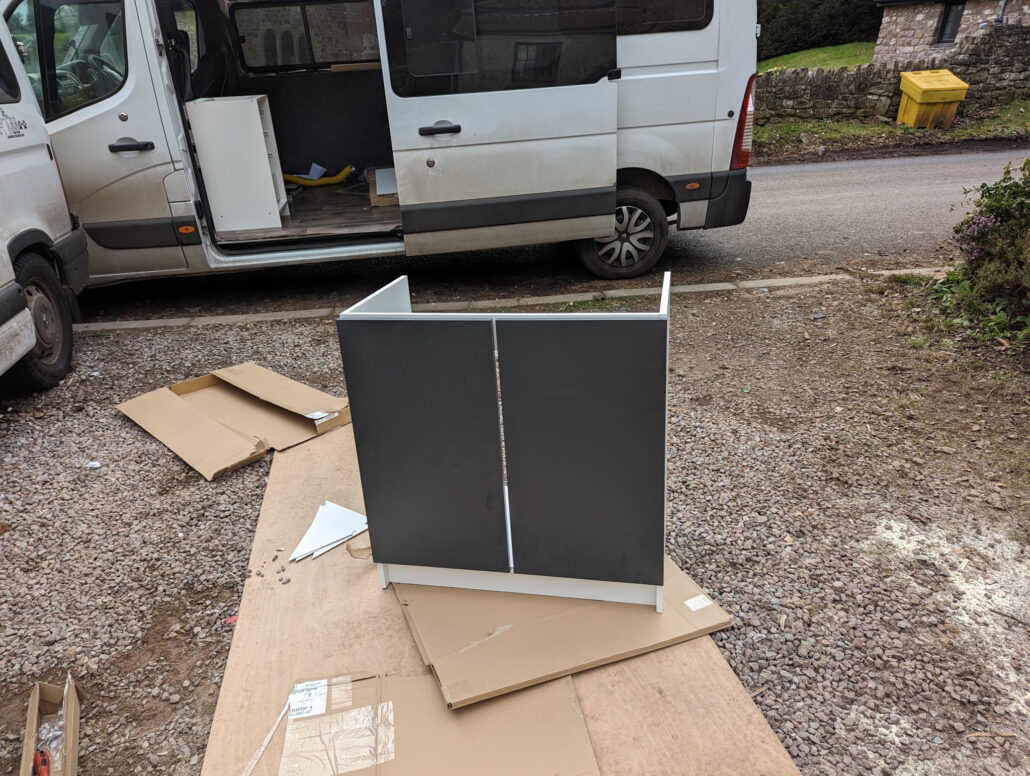
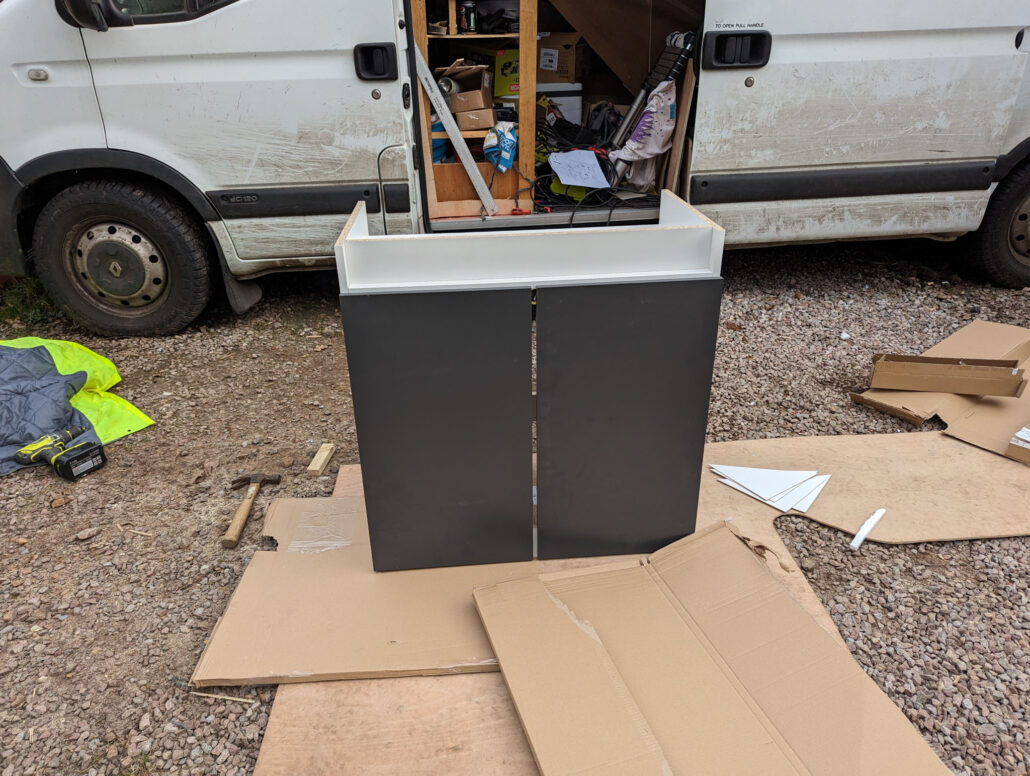
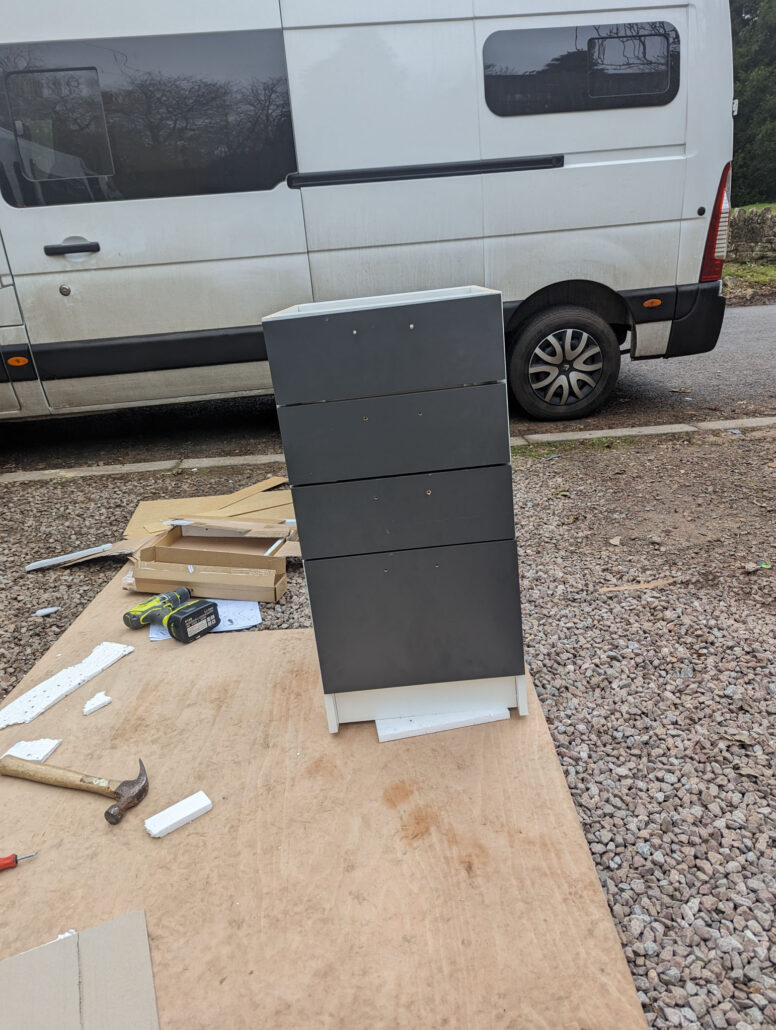
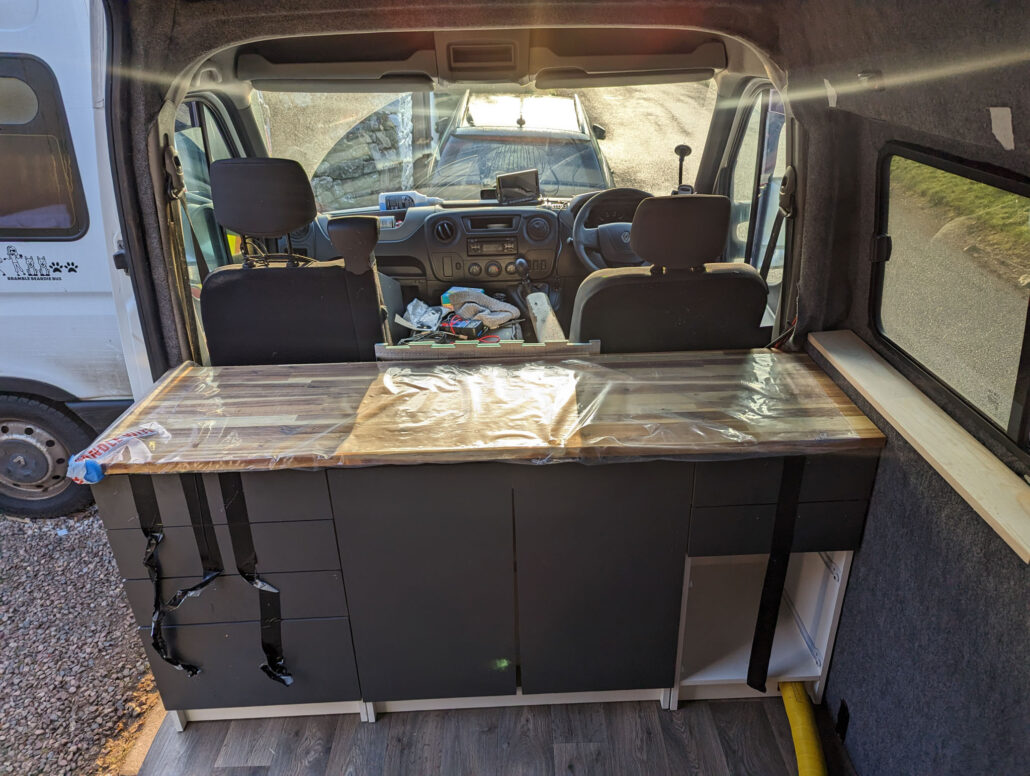
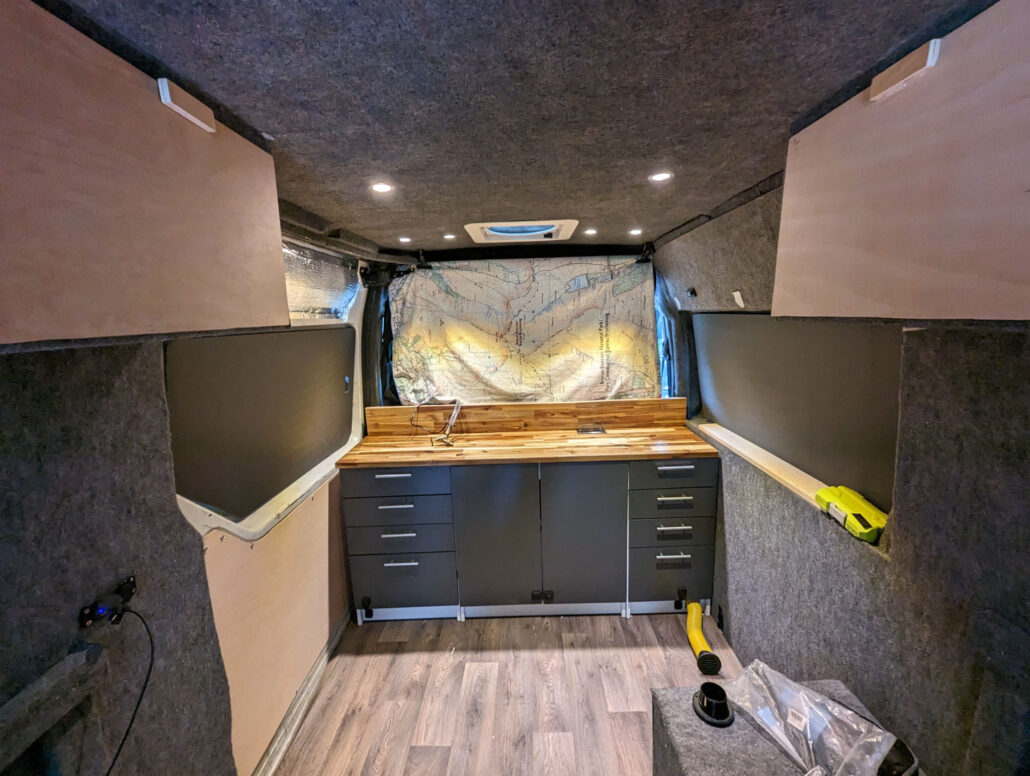
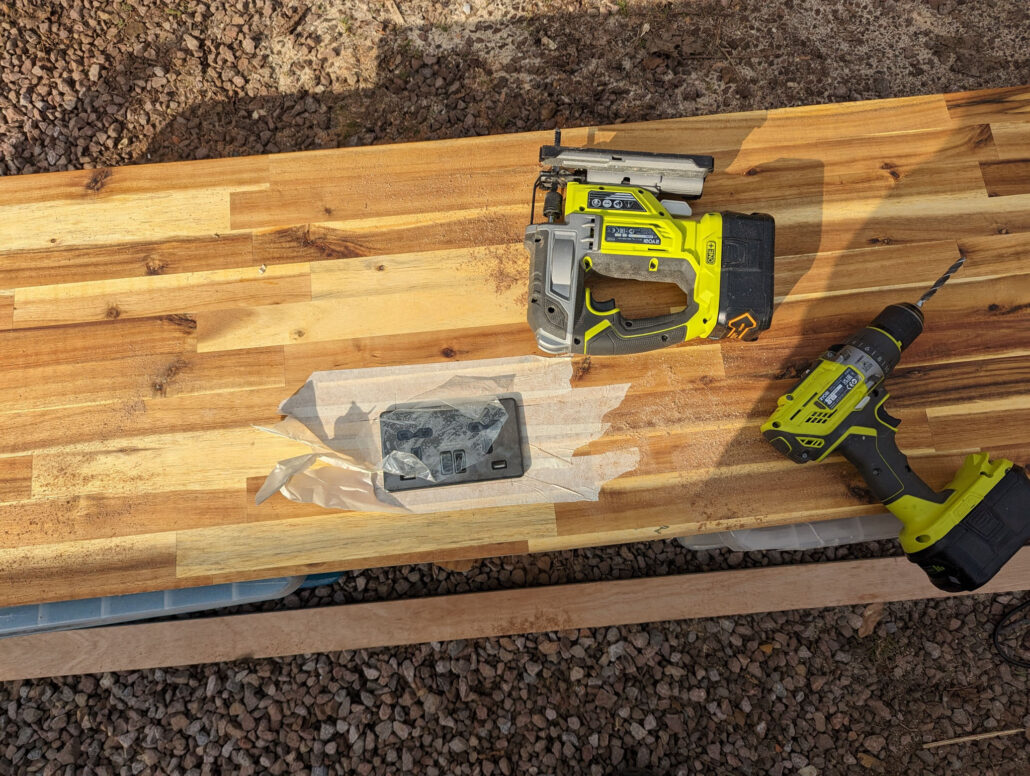
I made the first van kitchen from wooden battens but wanted something a bit nicer looking for this van. So I cheated and used Amazon to buy some kitchen units and a worktop! This was really quick to put together, is really sturdy when attached to each other unit, and with the work surface on the top (also from Amazon), looks pretty flipping good!

Water...
I used a 20l water tank for main water, with a couple of 5l water jerry cans in the back to refill if I'm away from a water supply and 15l jerry can for the dogs.
The main 20l tank is fitted with a 12v submersible pump that runs via a plastic tube into a jury-rigged brass pipe fitting. Yes, you have to turn the 12v on and open the tap to get water...but it works and looks ok for my uses. Washing up water, using biodegradable washing up liquid, goes out the door onto the grass verge or down a drain. For most of my cooking though its a paper towel and a spray mix of white vinegar and water to clean the pots, pans, plates and cutlery.
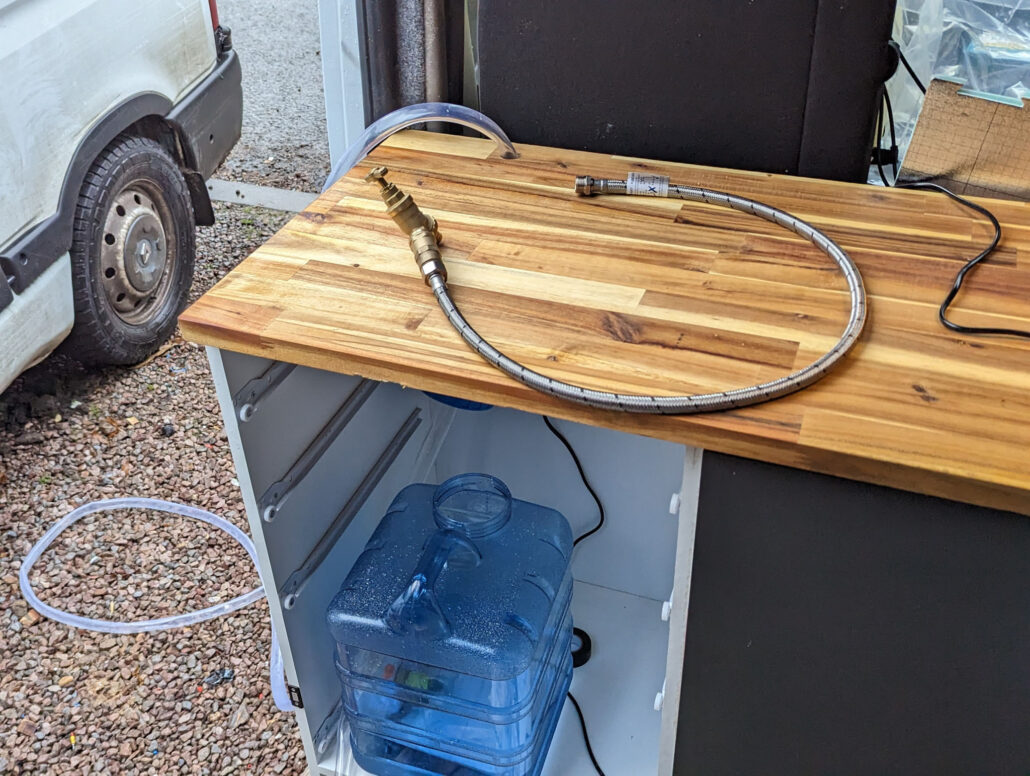
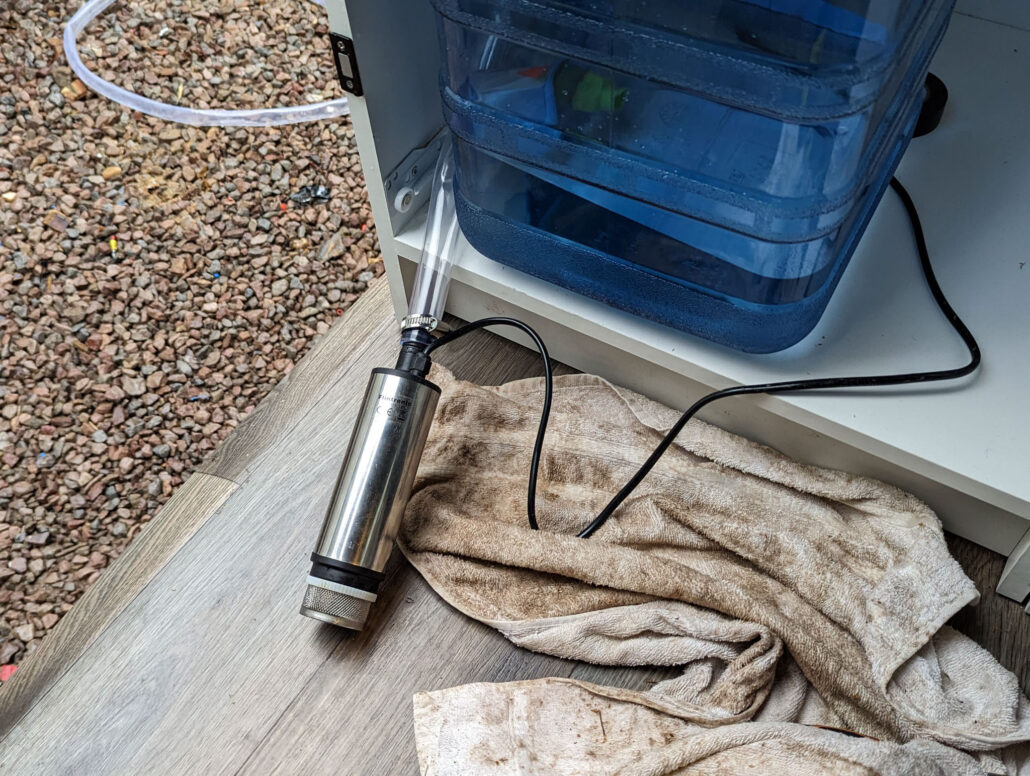
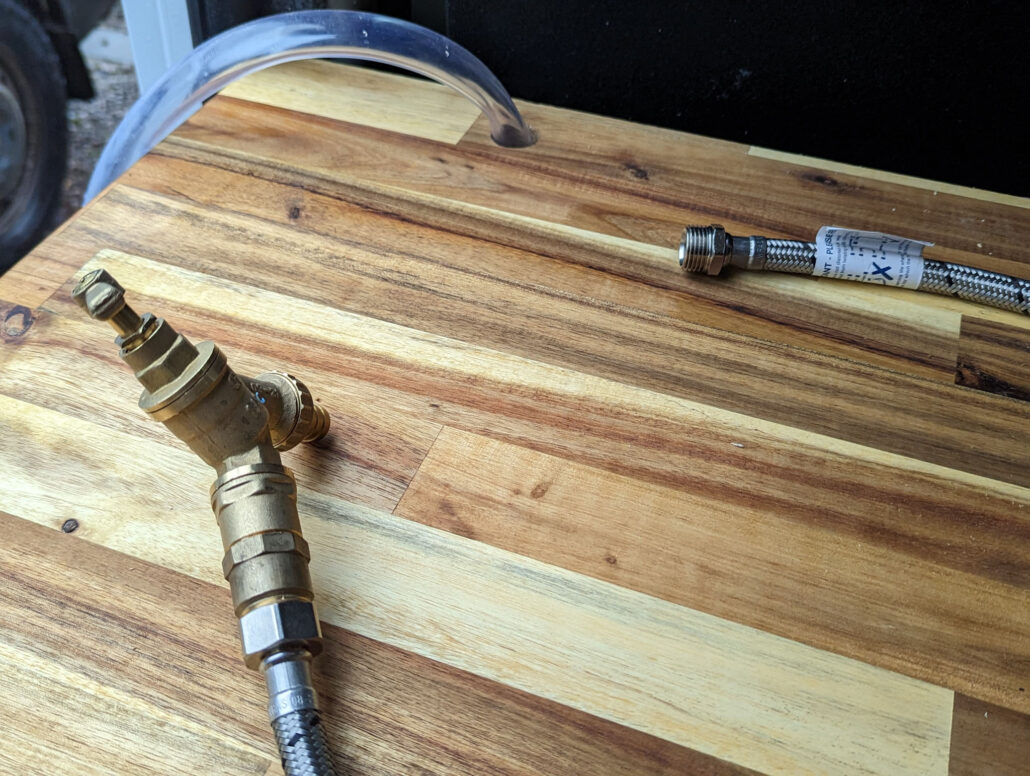
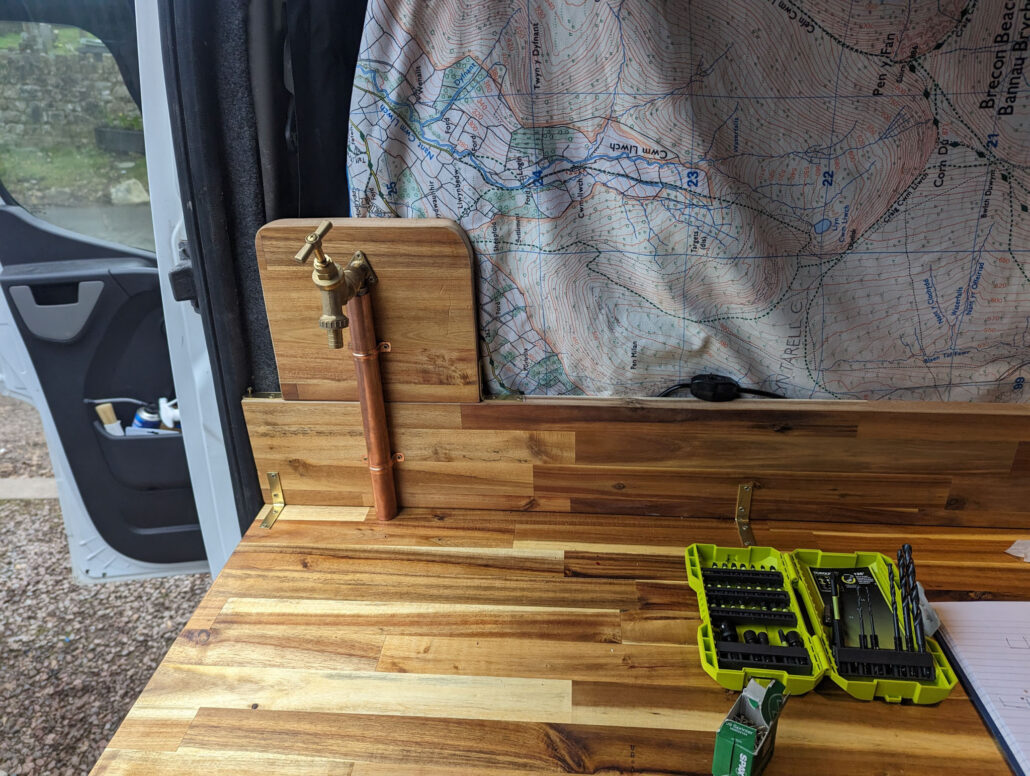
One of those Amazon kitchen units has a large bottom drawer...which is where the 20l container fits. I had to cut out the drawer section but I can still use that space anyway. The container is filled from the outside using more plastic tubing, saving having to take the 20l water container out every time.
Self built Campervan - Overhead Storage
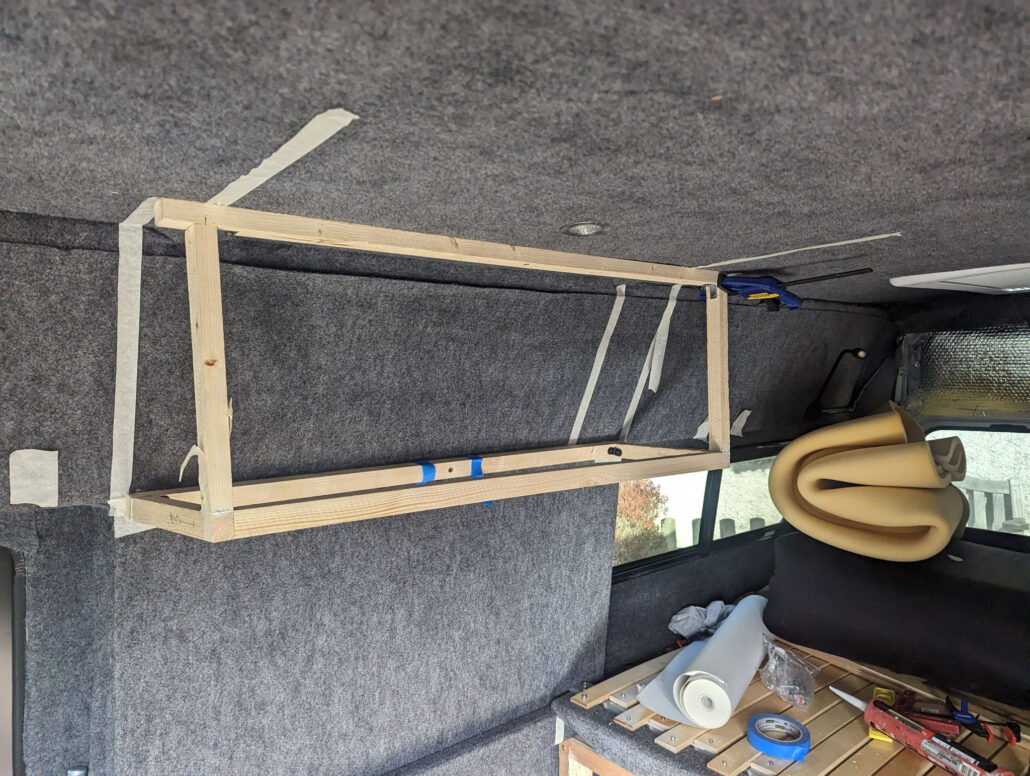
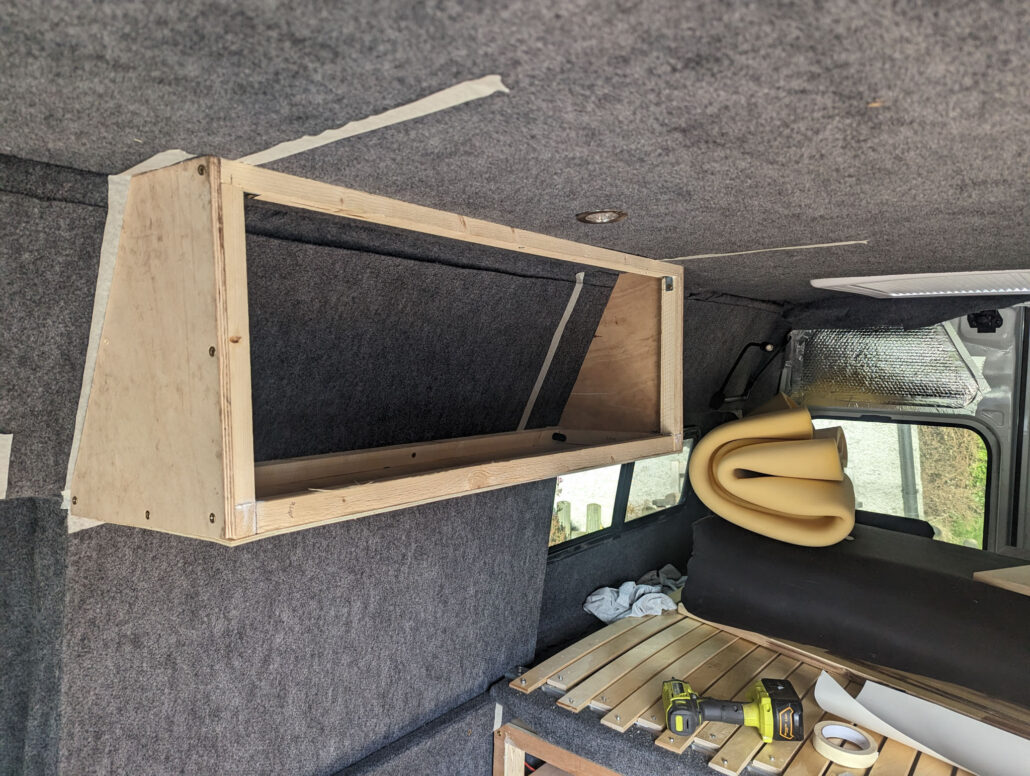
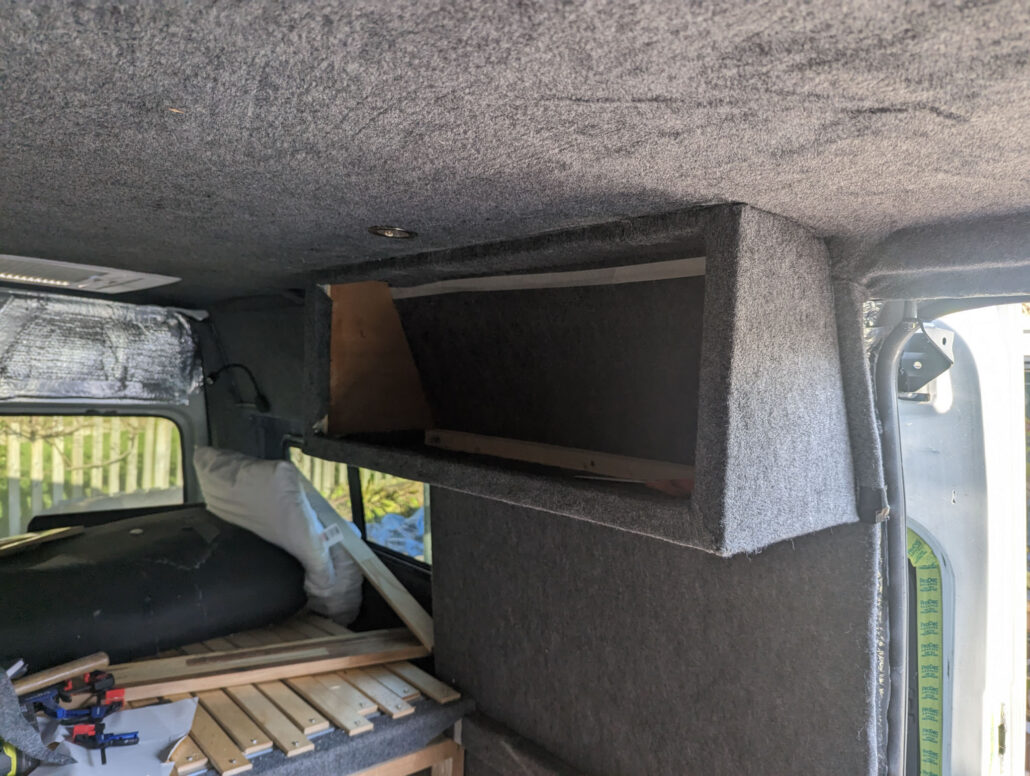
Over head storage is a great idea - but I honestly believe if you have loads of storage, you will fill it up with junk. Junk = weight. Weight = crappy fuel economy and possibly being stopped for being overweight!
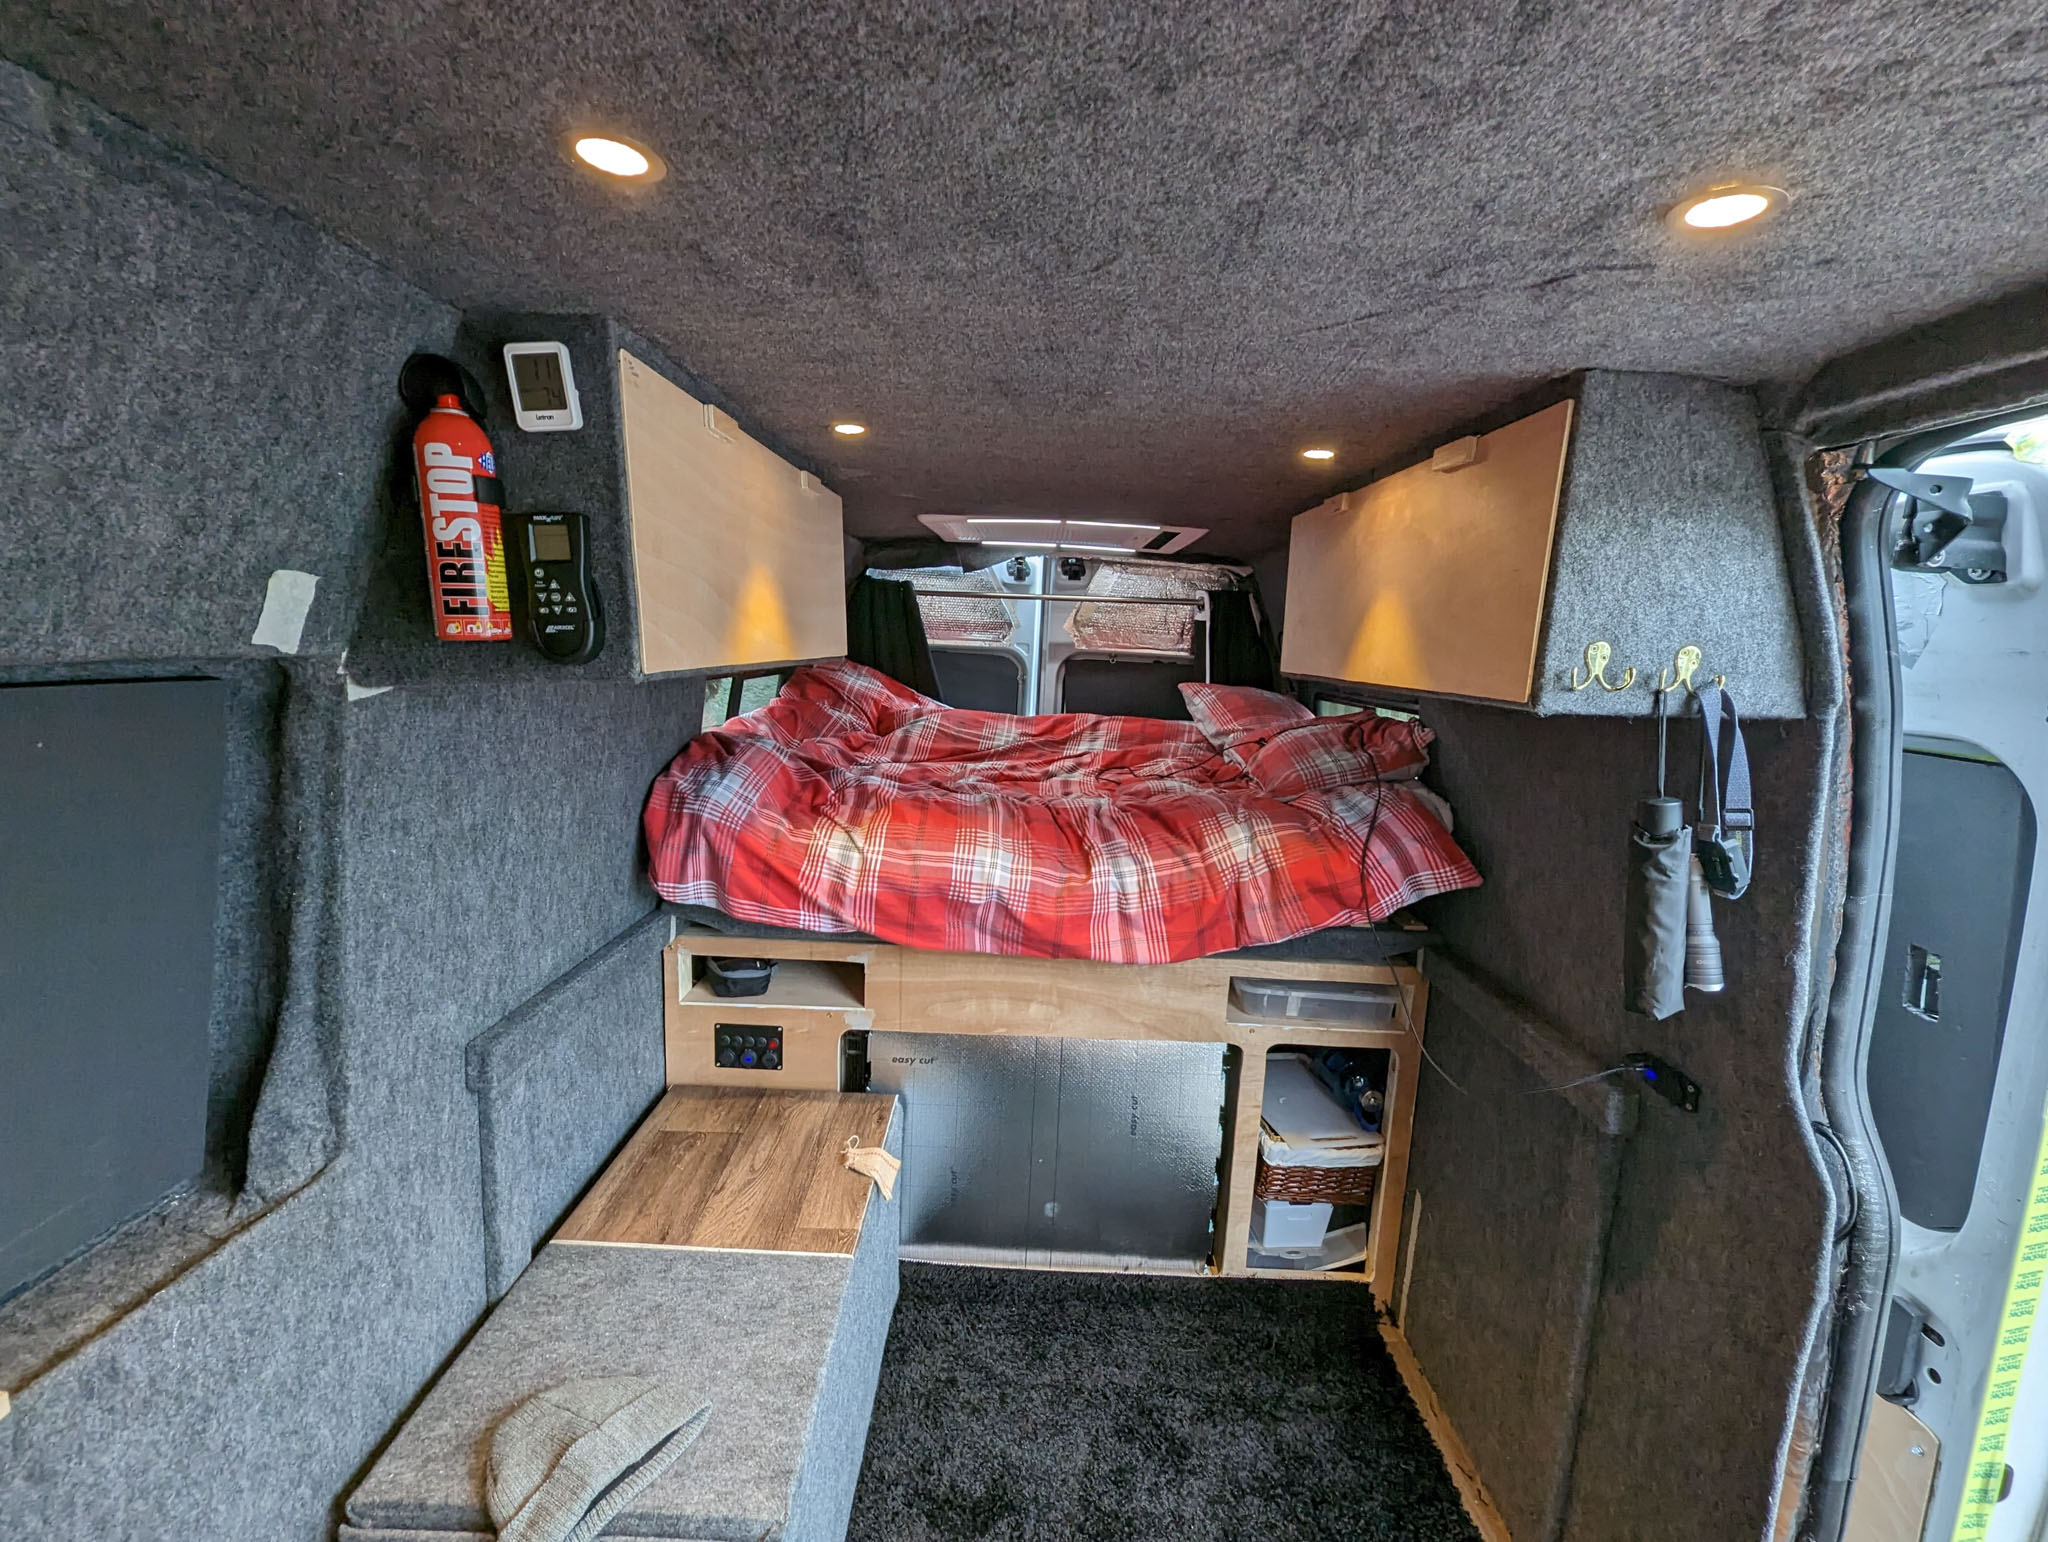
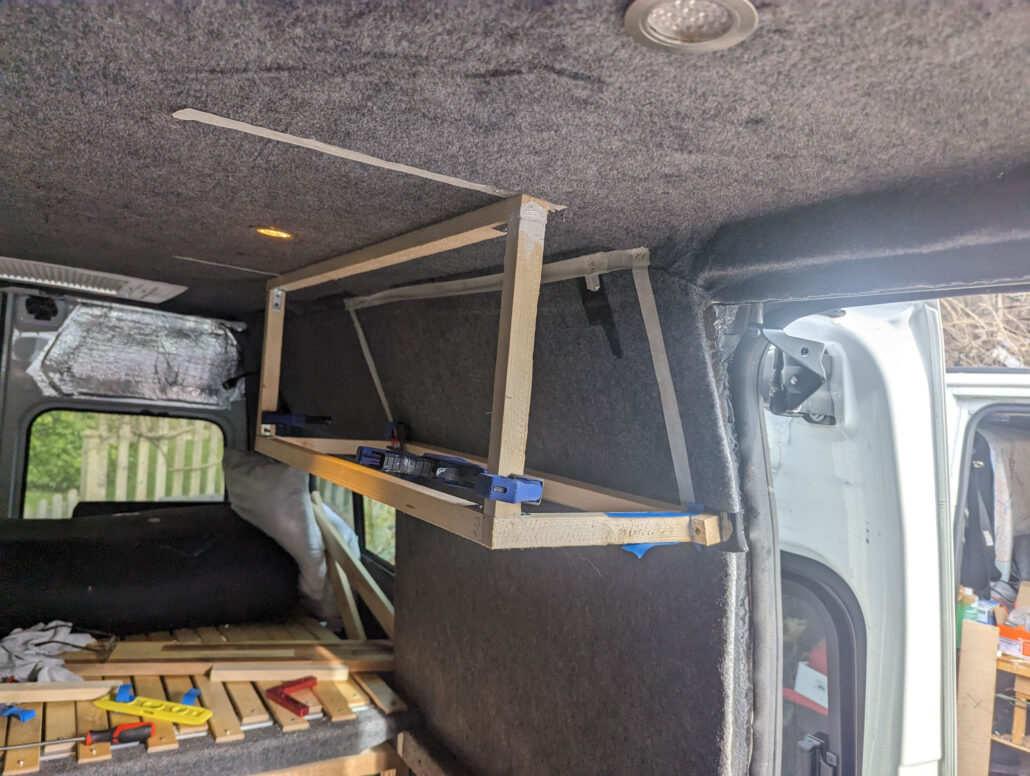
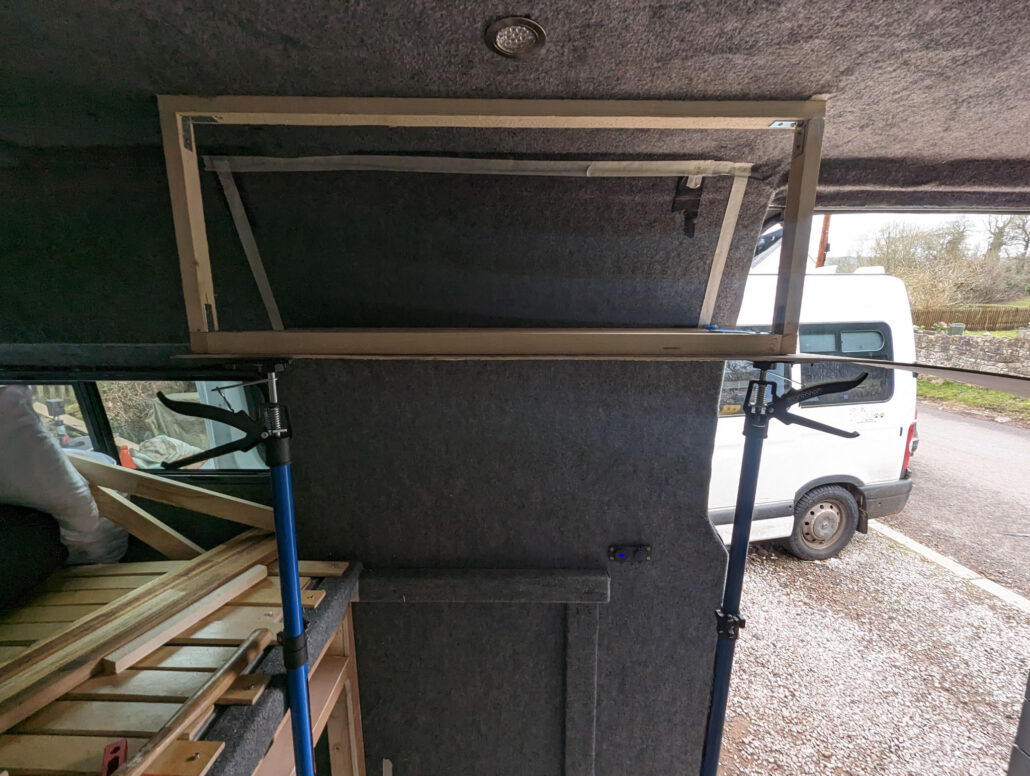
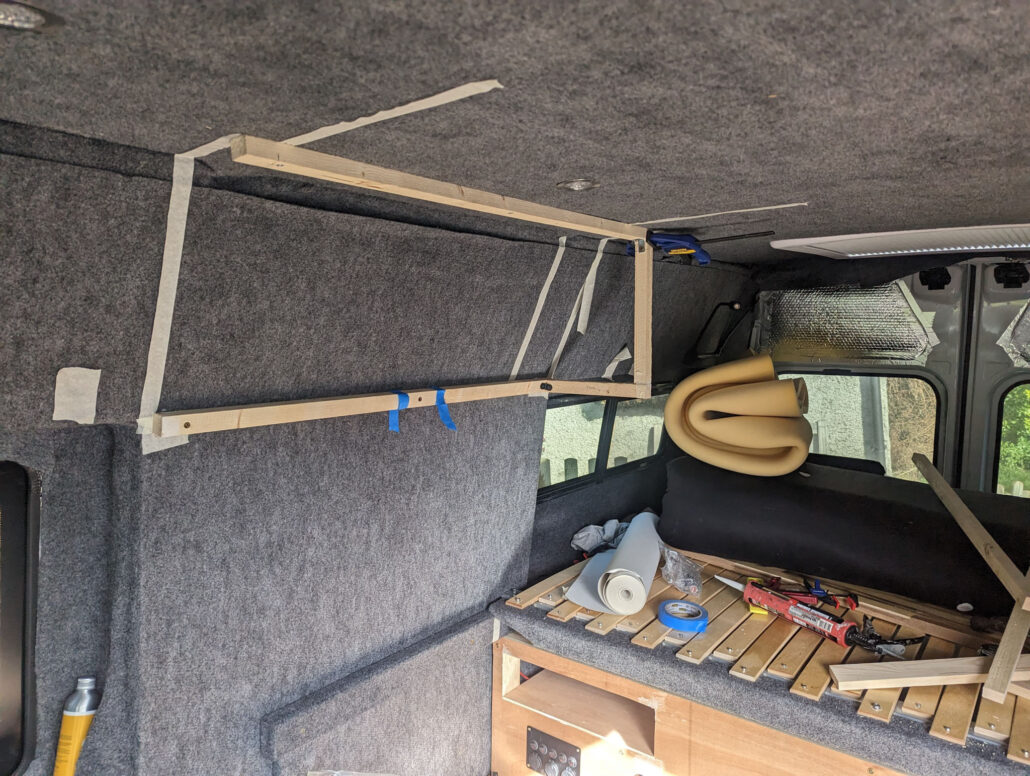
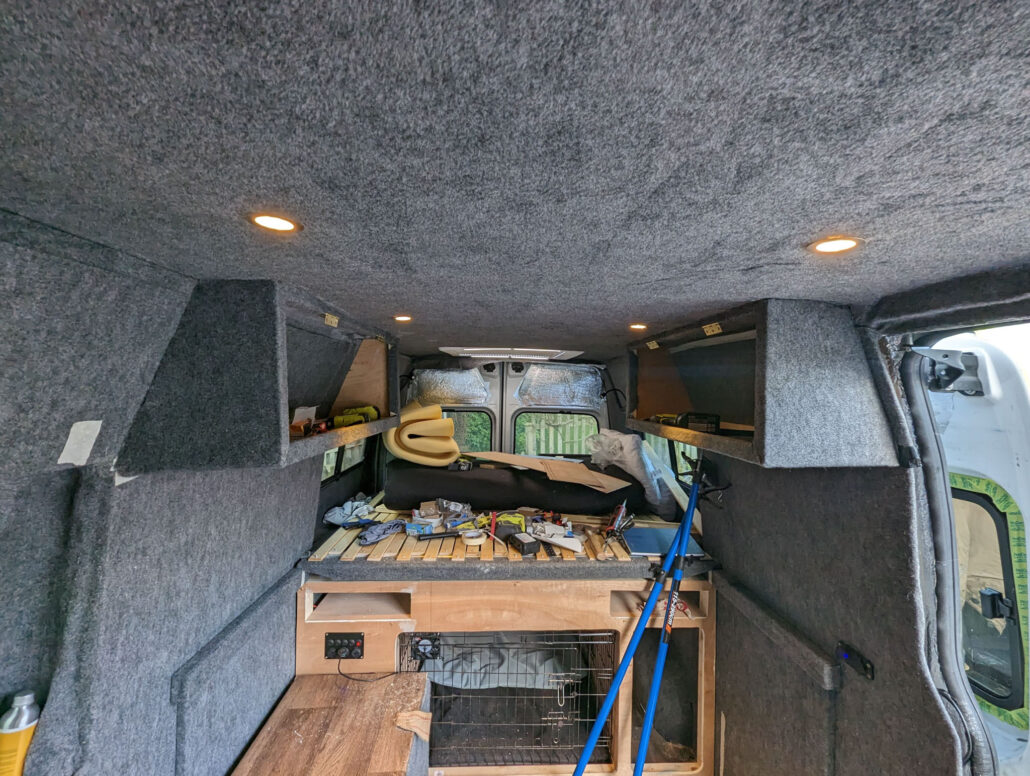
So, to keep the sense of space inside the van, and especially around the bed area, I opted for two overhead storage cupboards. One on each side. Screwed firmly into the wooden battens running along the plywood wall and to the roof battens they are large and very study! Carpeted to match with red wooden doors they look pretty good.
BTW - the colour scheme is grey and red ;-)
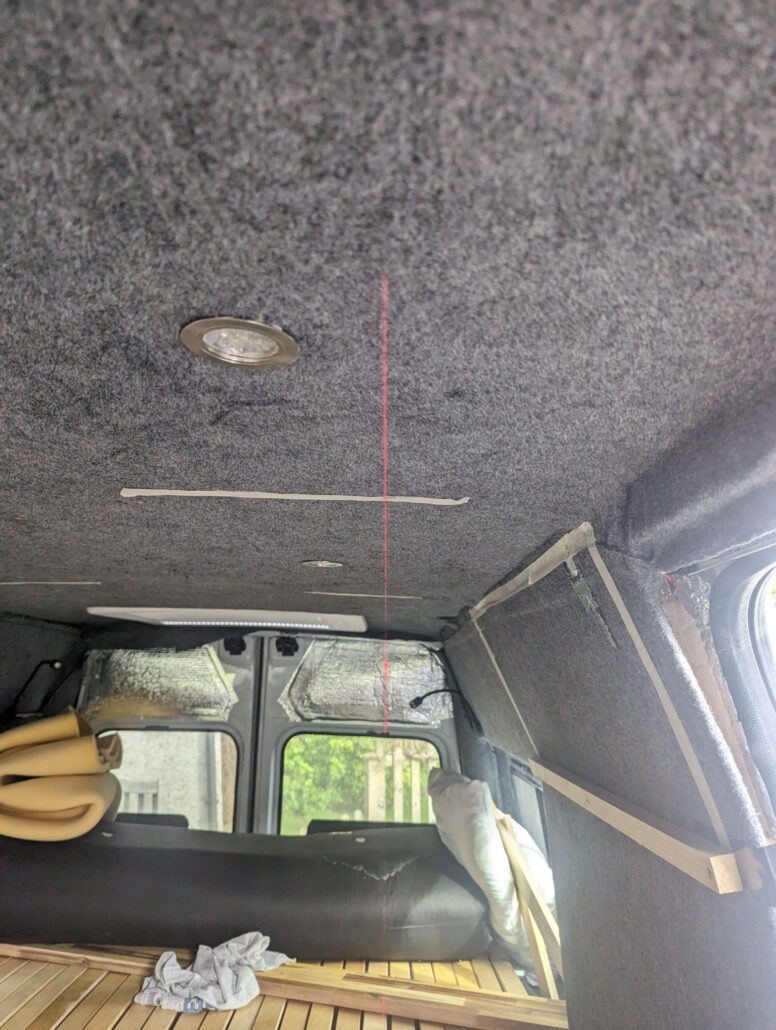
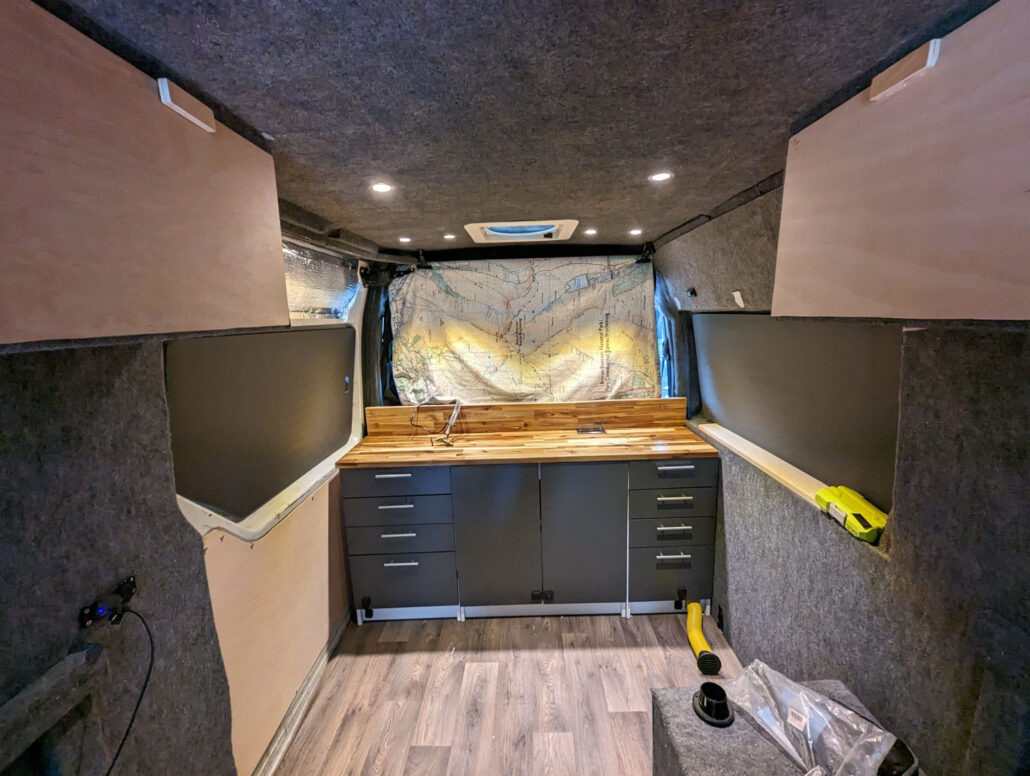
And that's pretty much it...
The seating area you can see to the bottom left of this image has a slide-out toilet and the wooden part is more storage. That isn't fixed and can be moved to the other side of the van should you need it. This means the toilet is easy to get at and easy to clean.

All in all, it took 7 weeks to get to this stage, working from early doors to late at night.
A few bits and pieces have been finished since the last photo - windows have been framed out, curtains added, wood varnished or stained etc.
A Word on Electrics...
I have a 200ah LiPo4 battery running the main 12v electrics in the van. That is connected to a 2000w inverter that powers the x2 230v sockets. It is charged by a single 410 solar panel on the roof (connected to the Unistrust via Alumnium L sheet) and by a DC-DC charger when I'm driving. The van is ALL electric cooking, and it works perfectly. It's possible to go totally off the grid for weeks, using the LED touch lights in the ceiling (all operated separately by touch - 4 over the kitchen unit, 2 in the living area and 2 near the storage cupboards.), the 10, yes TEN, USB sockets to charge my cameras and laptop. Using USB splitters, I have charged every piece of camera kit I have, all the dozen batteries, the 5 cameras, the DJI, the Insta360, the GoPro and a MacAir via USB and cooked fine and it all works without tripping a fuse or smells of burning!!!
It works perfectly.
I used Victron for the solar charge controller and DC-DC, Renogy for the battery and some cheap-ish model inverter from Amazon that I will upgrade to a Renogy 2000w pure sine wave inverter in about 2 months. I'm not sponsored by Victron - but the kit they have is smaller and easier to use and the app works! Unlike Rengoy's app which is abysmal!!!
Cooking-wise, I use a kettle, electric pans from Hytric and an air fryer, and I don't starve! It's easy to cook oven meals, all-in-one stews, fry stuff, make / heat soup etc.
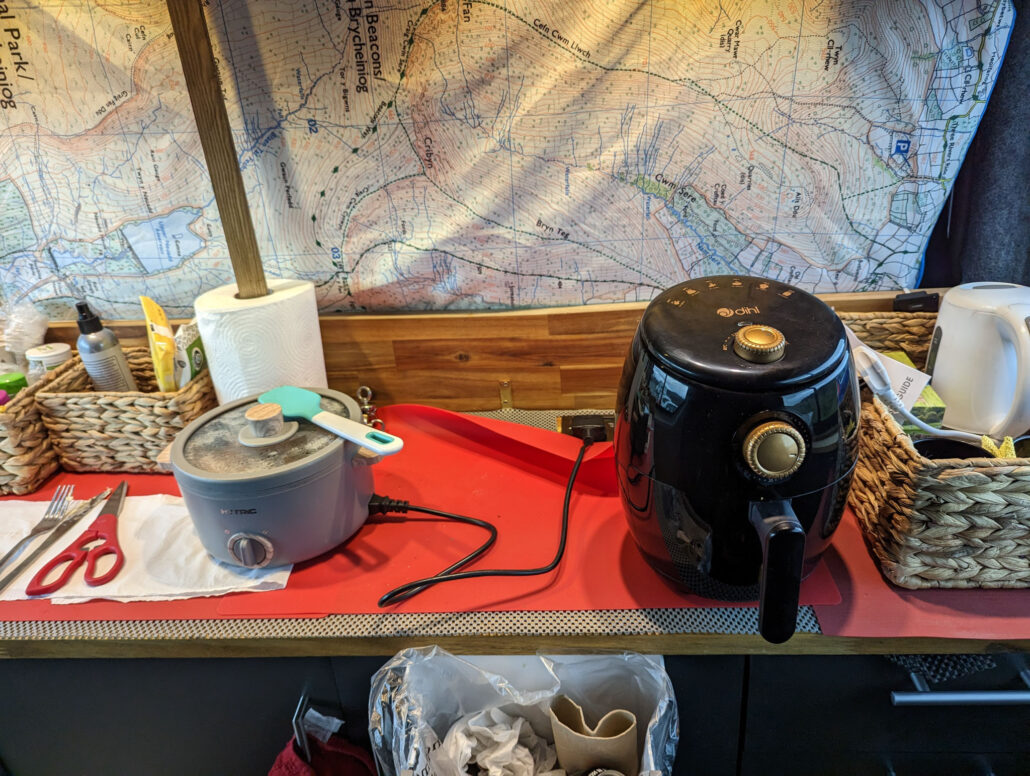
Why are there no photos of the electrical setup? - No need. It's all safe, It's all fused, it's all over-engineered...but it's a complete rat nest! It's out of the way, and there is no need for it to be on show. I soak-tested the set-up for 72 hours once I had installed it fully, and soak-tested as I went along.
Costs
The base van was £9k, the rest of the fit-out was about £6k and I have stuff left over such as 4 sheets of 100mm PIR board, loads of plywood sheets, screws, SikaFlex, Hard as Nails, MPPTs I tried and didn't like and a Renogy DC-DC unit. Being realistic, I'd say about £1.5k of stuff left over. So the total cost of the build was in the region of £13,500
Could I have done it cheaper? Yes, and I could have waited longer for parts, supplies etc. Being on a time frame means you either extend the time frame, use lower-quality parts or pay for what you want when you need it. I went for the latter.
I know that the campervan will save me money in the medium term. For every wedding I stay over at, I budget £125 for hotel and meals. That's only 108 nights away on business to recoup the cost. Bear in mind that a wedding in Yorkshire is at least a two-night 2 stay, for example. Or a wedding more than 2 hours drive away is a night's stay at the least, and that 108 days adds up quickly. Especially when you think I have a total of 63 weddings to photograph this year all over the country ;-)


0 Comments